
What is the Stripe Connect?
The CS-Cart Stripe Connect add-on enables you to accept credit card payments safely via Stripe Connect payment getaway.
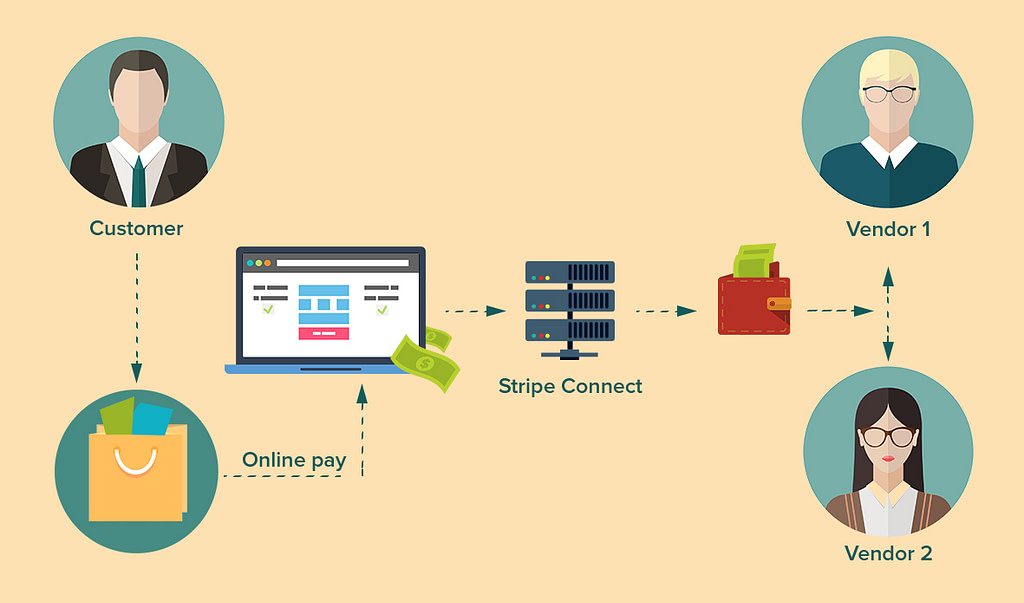
When the customer pays for the order, the payment is transferred directly to the vendor account and as the store owner you collect a fee from the amount paid to the vendor.
With Stripe the payments made by the customers are automatically split between vendors and admin, so all the details of distributing money stay behind the scenes and are not available to the user.
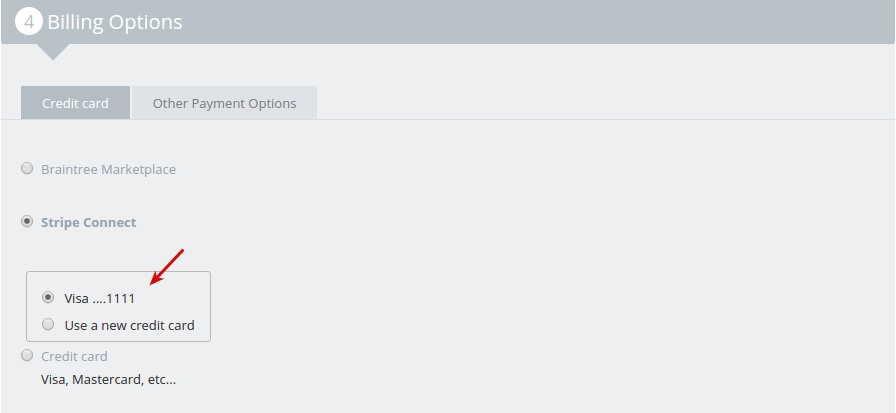
The add-on also enables the customer to create a Stripe account. If a credit card is added in the profile details, the credit card information will be autocompleted if the Stripe Connect payment method is selected at checkout:
Compatibility
The add-on is compatible with Multi-Vendor 4.3.7-4.6.x.
Starting from version 4.7.1, the add-on was included in the default functionality.
How it works
When a customer pays for an order that consists of products from different vendors in one cart, Stripe Connect automatically splits the payment between the vendors, transferring the commission to the account of the store owner.
The add-on automatically calculates the amount of money that should be transferred to the vendors for their products in the order.
You no longer have to worry about how the money is divided between your vendors; Multi-Vendor and Stripe Connect will do it for you.
Features
- Allow your buyers to pay via Stripe Connect
- Fully integrated with standard accounts
- Accept main credit cards worldwide: Visa, MasterCard, American Express, Discover, JCB and others
- Automatically split payments between vendors and admin
- Make payment transactions secure and quick
Support
This add-on is developed and published by Simtech Development Ltd., a CS-Cart developer. You are guaranteed a quality add-on supported by the future versions. If you need help, please contact us via our help desk system.
Get started with Stripe Connect
In this section, you can find details of creating a Stripe account. You will also learn how to get Secret key, Publishable key, and Client ID required to create the “Stripe Connect” payment method.
First of all, the store owner will need to login to the Stripe account or register a new one at Stripe .

Once you create your account, you will be redirected to the Stripe dashboard.
Setting up a Stripe account
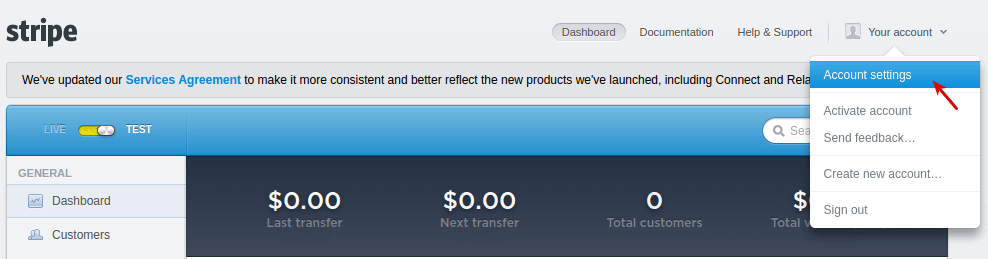
Navigate to Your account – Account settings in your Stripe account.
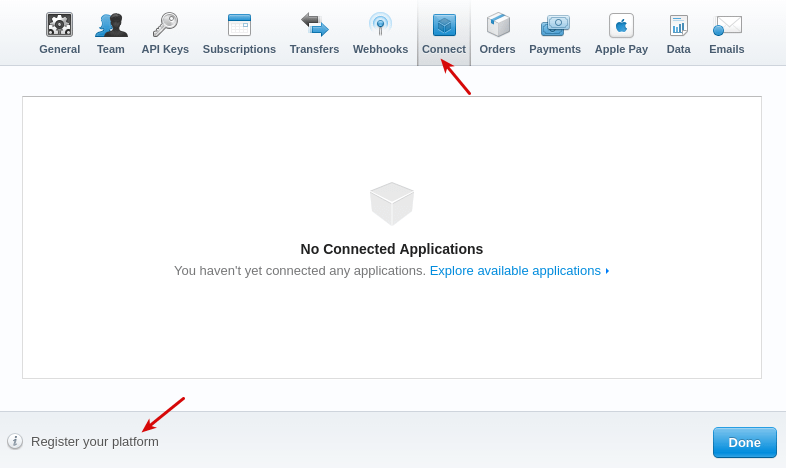

Open the Connect tab and click Register your platform at the bottom.
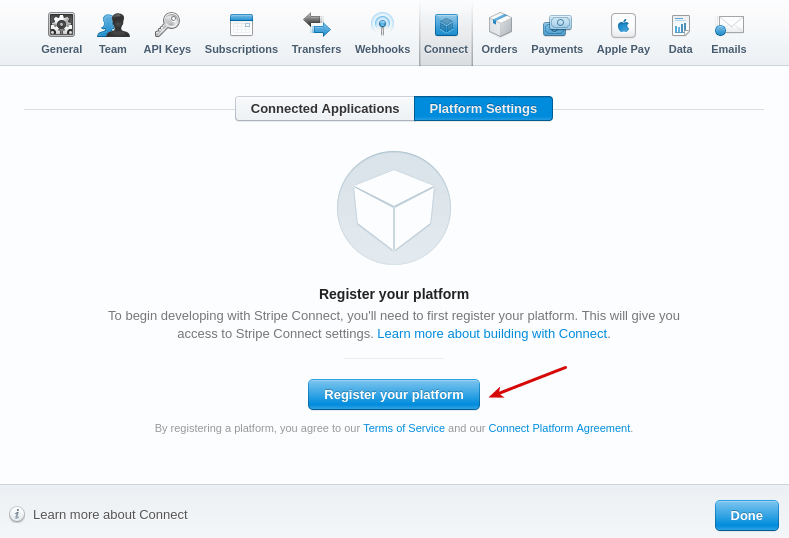
Click the Register your platform button.
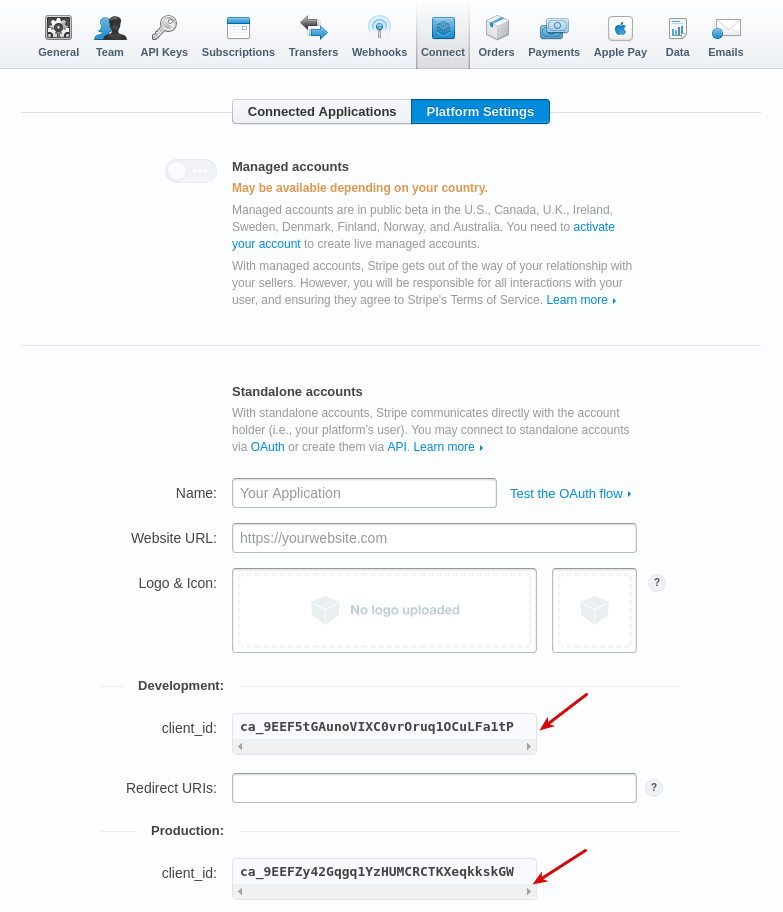
Open the Connect tab and enter all the necessary information:
- Name—a name for the payment getaway (for example, Stripe Connect)
- Website URL—the URL of your website in the format: https://yourwebsite.com
- Redirect URls for development—endpoint on your development server where your users will be redirected back to after they connect with Stripe. Can be localhost. The URls should be specified in the format (separated by a comma): https://yourwebsite.com/admin.php?dispatch=companies.stripe_connect_add_vendor, https://yourwebsite.com/vendor.php?dispatch=companies.stripe_connect_add_vendor
- Redirect URls for production—endpoint on your production server where your users will be redirected back to after they connect with Stripe. Must be HTTPS. The URls should be specified in the format (separated by a comma): https://yourwebsite.com/admin.php?dispatch=companies.stripe_connect_add_vendor, https://yourwebsite.com/vendor.php?dispatch=companies.stripe_connect_add_vendor
Click Done.
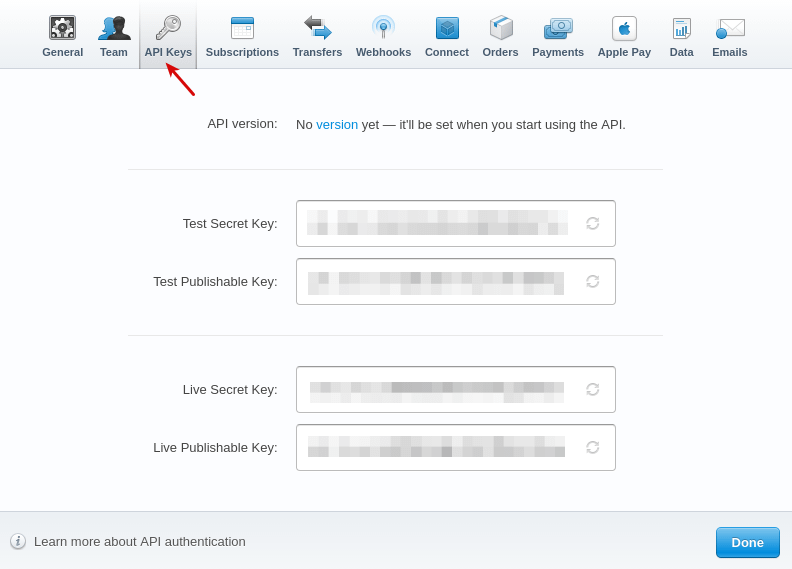
Getting Secret key and Publishable key
Under Account settings, open the API keys tab to see Stripe Secret key and Publishable key:
Getting Client ID
To get Client ID, go to Your account – Account settings in your Stripe account.

Open the Connect tab and you should see the value for client_id for development (for testing purposes) and production (to use in a live store).
Managing in the admin area
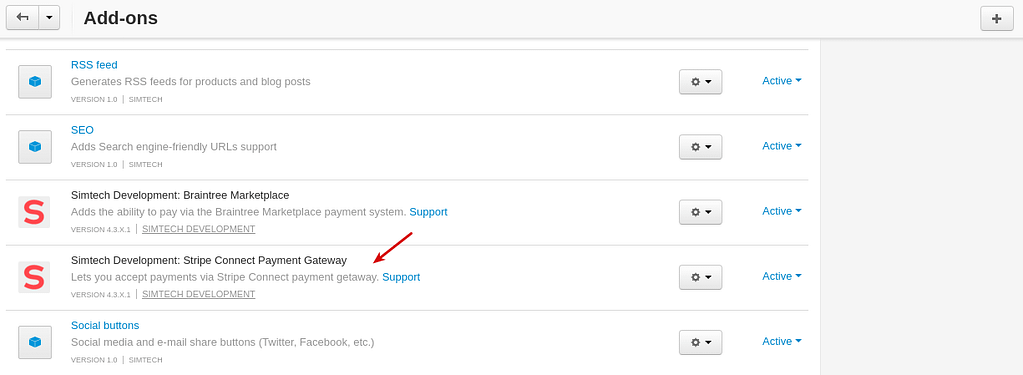
Installing the add-on
Install the “Stripe Connect” add-on on the add-ons list page (“Add-ons” → ”Manage add-ons”). Click the + button in the top right corner, select an archive and click Upload & install. You can now find the installed add-on in the list of installed add-ons, just make sure it is set to Active.
Creating a payment method
To create and configure the Stripe Connect payment method:
- Go to Administration → Payment methods.
- Click the + button to create a new payment method.
- Select Stripe Connect from the Processor selectbox.
- Switch to the Configure tab, enter the details of your payment account:
- Secret key
- Publishable key
- Client ID.

To get these credentials, have a look at the Getting Secret key and Publishable key and Getting Client ID sections.
- Using the Creating payments setting, define how the payments should be processed. Here you have two ways:
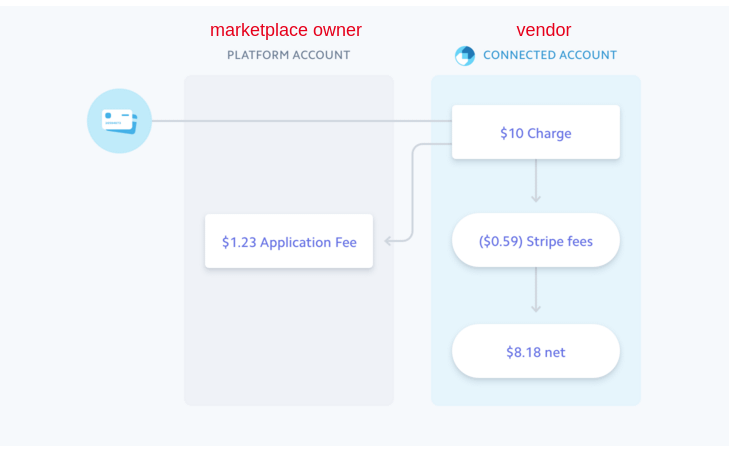
- charging directly—the customer pays to the vendor directly and then the commission is taken to the marketplace owner. As a result, the vendor gets his payment, pays the Stripe fee and the marketplace owner gets the commission.
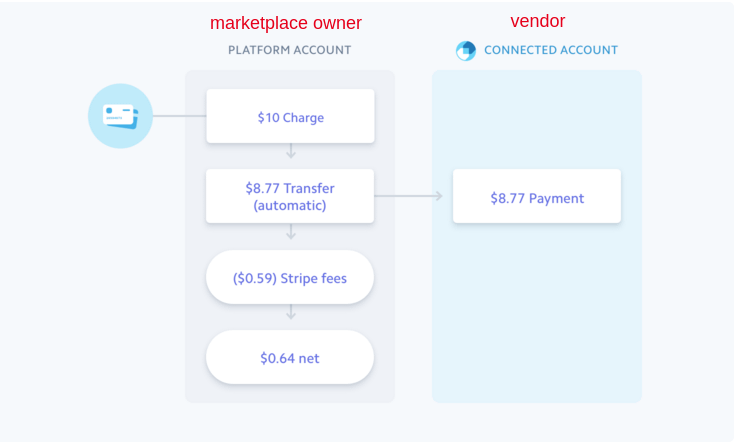
- charging through the platform—the payment goes to the marketplace owner’s account first and then the necessary payment is deposited into the vendor’s account. The marketplace owner pays the Stripe fee and gets the commission.
For more details on creating charges, continue reading this article in the Stripe Connect documentation.

- Use the Allow user to create an account setting to define whether customers can create a Stripe account in the store and save it for further use at checkout.

- Select the currency you want to accept payments in.
- Click Create.
Creating Stripe accounts for vendors
Every vendor in your store who wants to accept payments via Stripe Connect must have a Stripe account. The steps below describe the process of getting a Stripe account by a vendor.
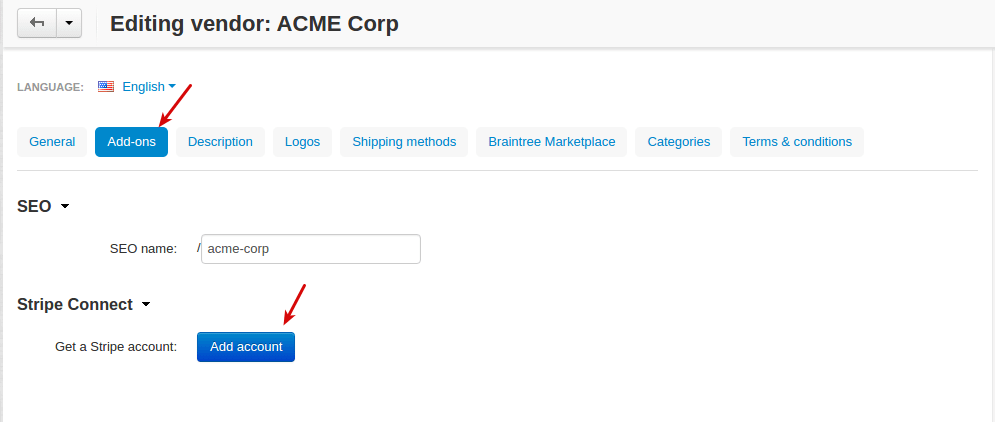
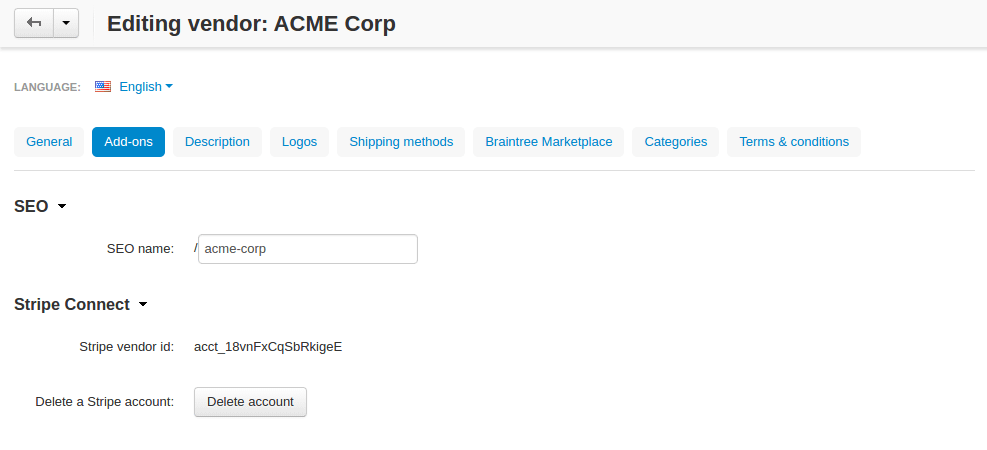
The vendor will see a new Stripe Connect section in the Add-ons tab in their profile and should click Add account.
After that the vendor will be redirected to the Stripe registration form, where they should enter all the necessary information.
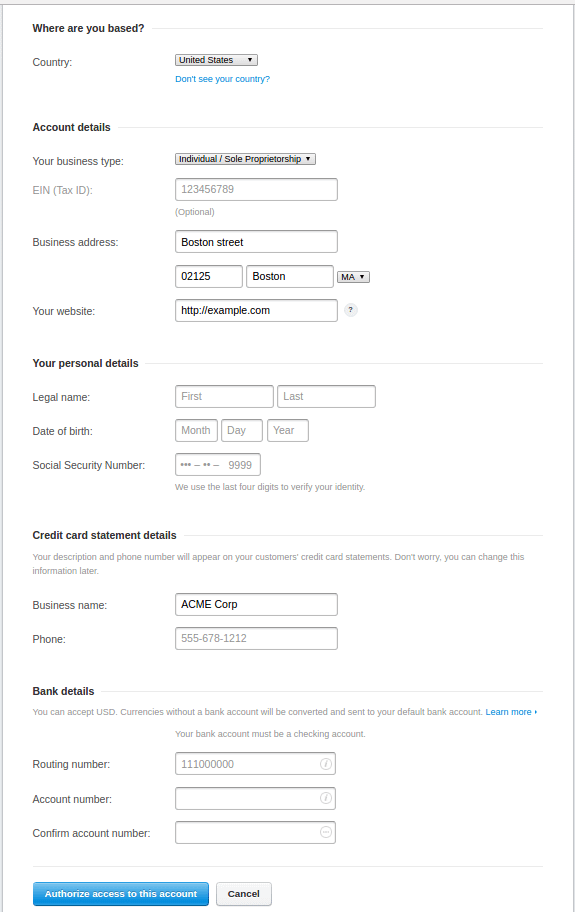
Once the form is filled in, the vendor should click Authorize access to this account. The account will be created, and the vendor will be redirected back to the profile page.
Done! Now vendors can accept payments via Stripe Connect.
What the customer will see
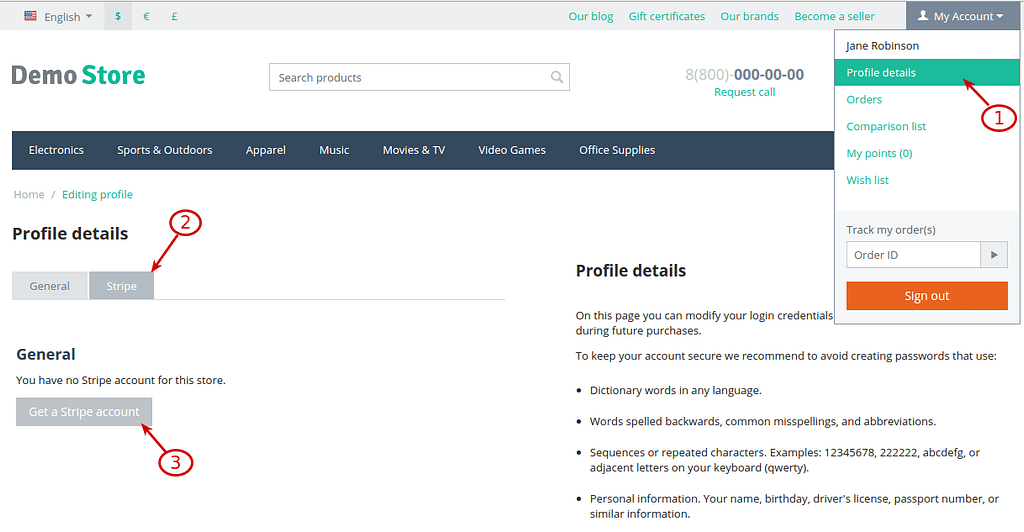
Setting up the user profile
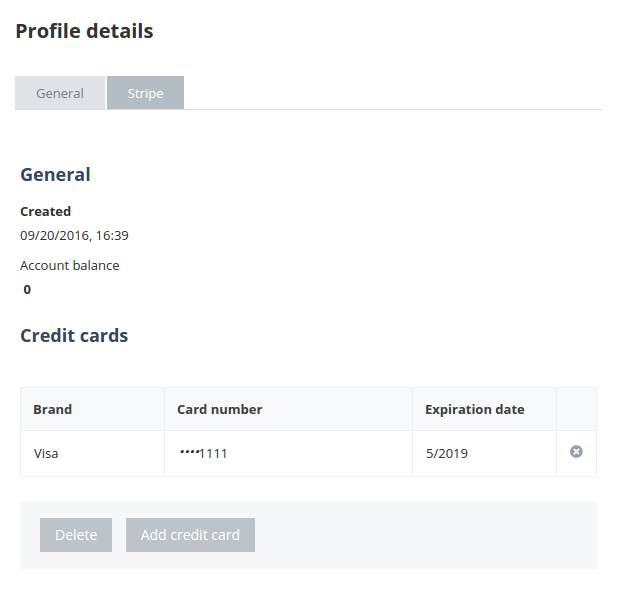
A customer can create a Stripe account in your store. For this purpose this integration adds the Stripe tab to Profile details. The customer just needs to click the Get a Stripe account button.
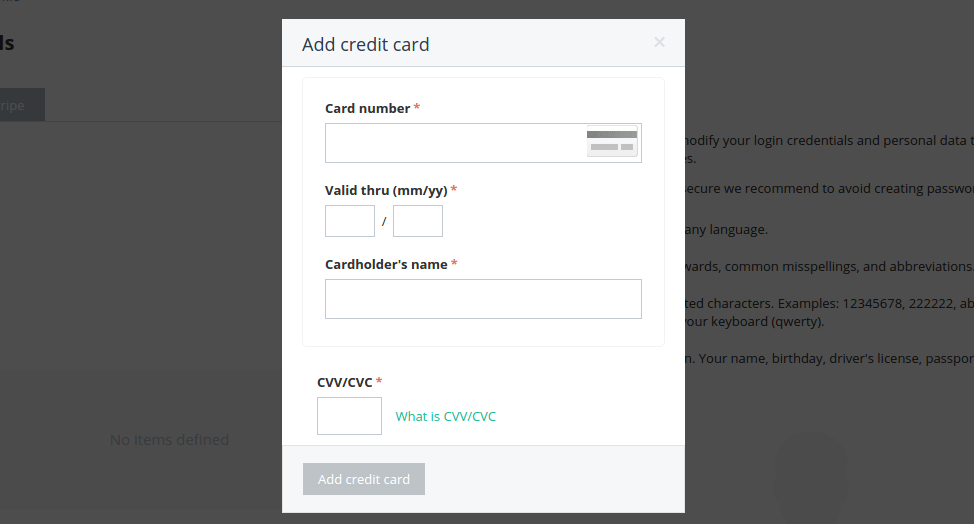
and then click Add credit card.
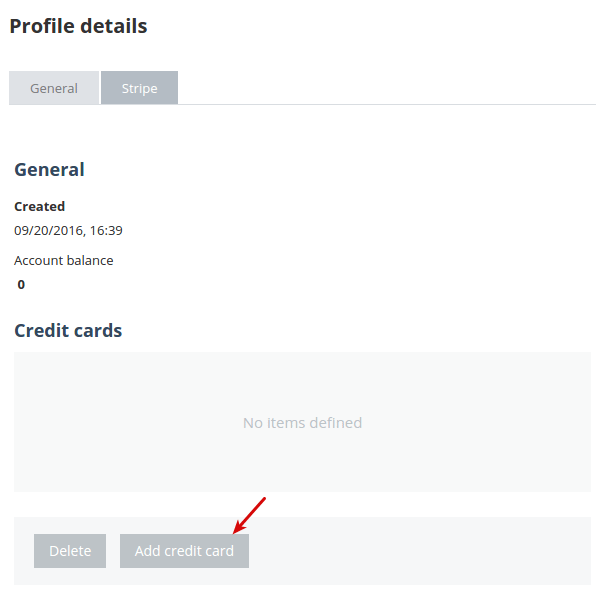
In the opened pop-up, the customer needs to enter the credit card information.
On this page, the customer can add/delete credit cards.
Checkout page
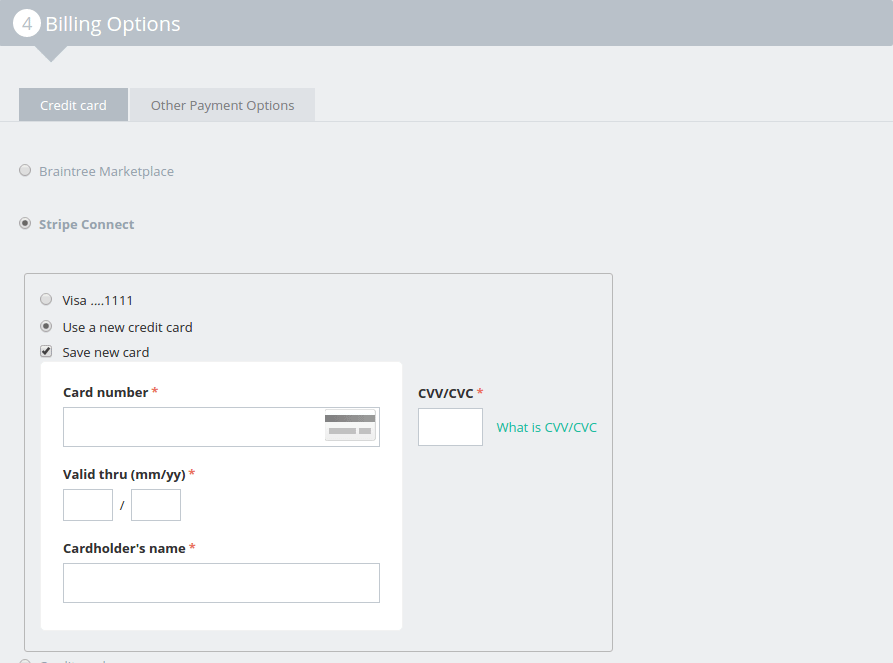
If a credit card is added in the profile details, the credit card information will be autocompleted if the Stripe Connect payment method is selected at checkout:

Or the customer can choose to use a new card and save its details in the profile:
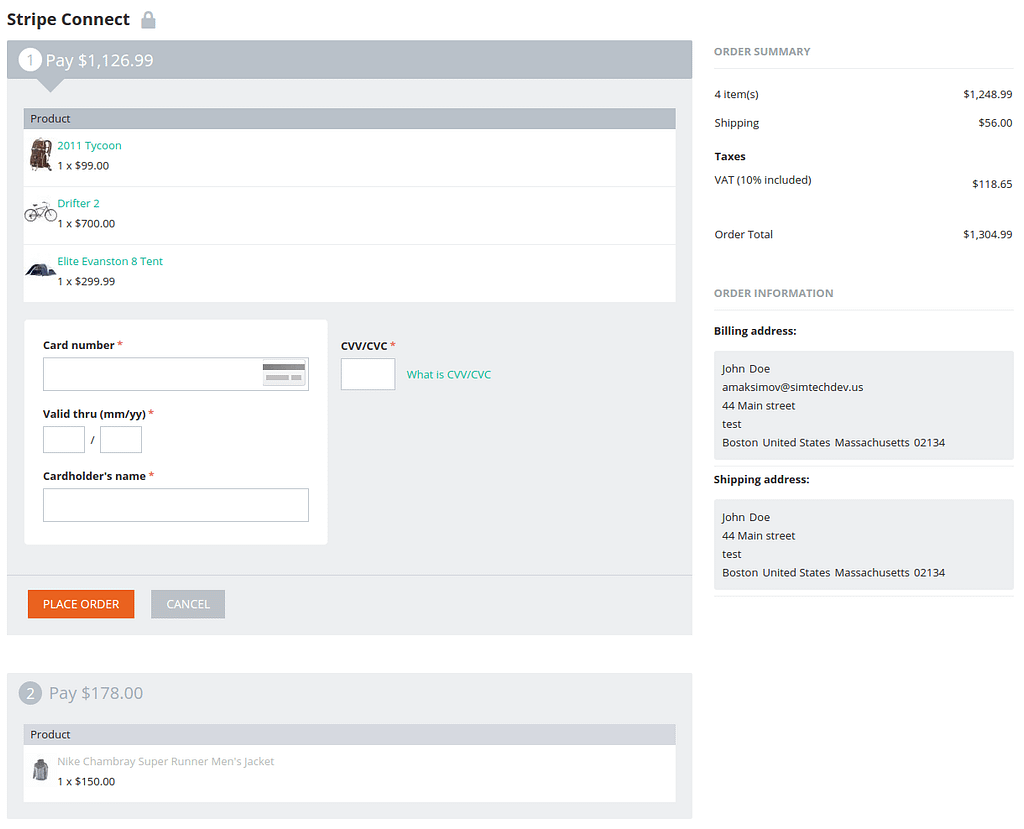
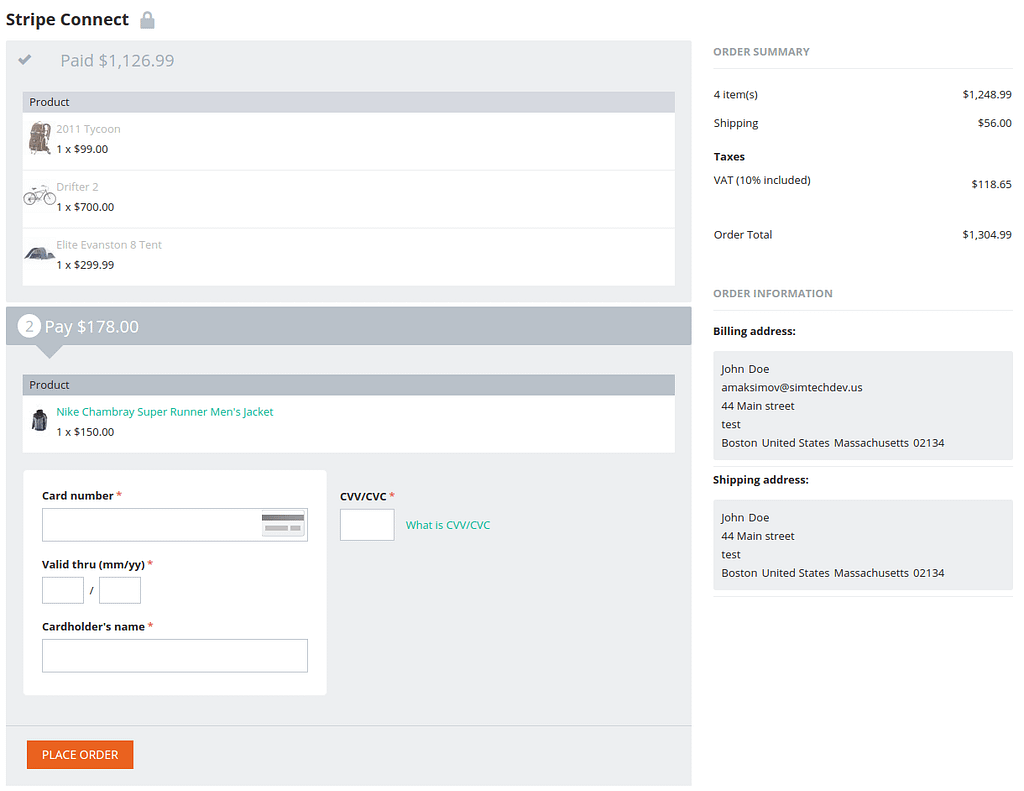
If there are products of more than one vendor in the customer’s cart, the whole cart will be split into several cases by vendors and the whole order will be paid in several steps. The screenshots below clearly demonstrate this.
First, the customer pays for the products from one vendor.

After successful payment of the first case with products the customer will be suggested to pay for the rest products.
When viewing the order details the customer will see two created orders:
