What is the Google Tag Manager?
Google Tag Manager is a professional instrument for modern marketers that allows to quickly manage tags and code snippets on your website. Instead of editing your website code or asking developers to do that for you, you can now easily add and update Google tags or any custom tags directly from the Google Tag Manager interface.
The Google Tag Manager add-on integrates Google Tag Manager into your website, which will free you from having to involve developers when configuring tags. All you need to do is just follow simple instructions below.
With our add-on, you will be able to track real-time events, like adding a product to cart, adding a product to wish list or comparison list, in your Google Analytics account.

To learn more about Google Tag Manager, you can watch this video
Compatibility
The add-on is compatible with CS-Cart and Multi-Vendor 4.3 and above, but only versions 4.11.x, 4.12.x and 4.13.x are supported.
Support
This add-on is developed and published by Simtech Development Ltd., a CS-Cart developer. You are guaranteed a quality add-on supported by the future versions. If you need help, please contact us via our help desk system.
Demo
Check out the Google Tag Manager add-on in our demo store.
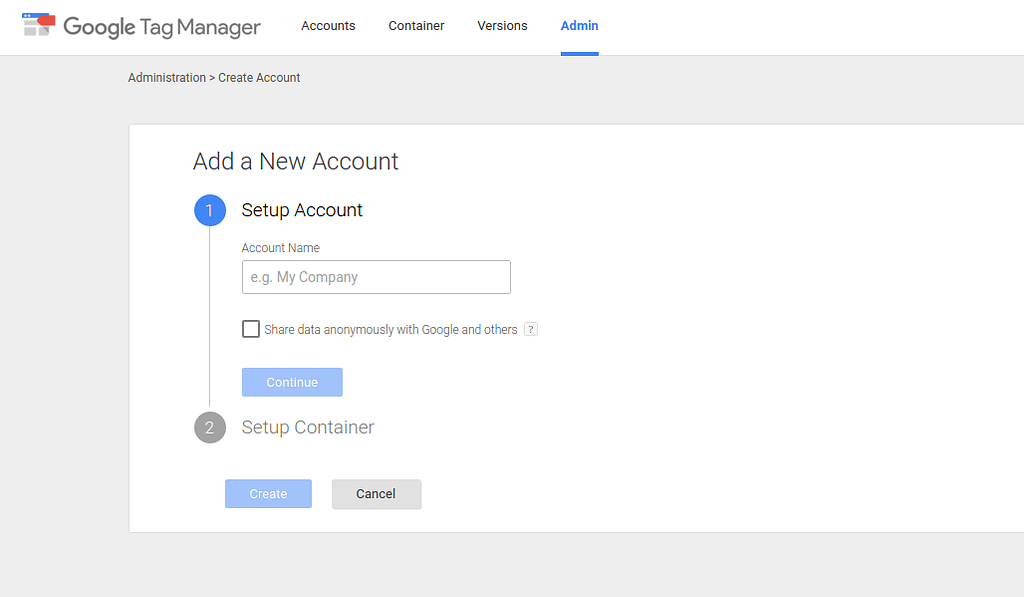
Creating an account
First, you need to go to Google Tag Manager to create a Google Tag Manager account and a container for your site. Enter your company name into the Account name field and select the Share data anonymously with Google and others checkbox (to enable anonymous benchmarking). Then enter a descriptive name of your site into the Container name field. The container will store all of your tags, for instance, Google Analytics tag, AdWords tag, or 3d party tags. Then click Create. Read the Terms of Service Agreement and click Yes to accept the Terms.
Managing in the admin panel
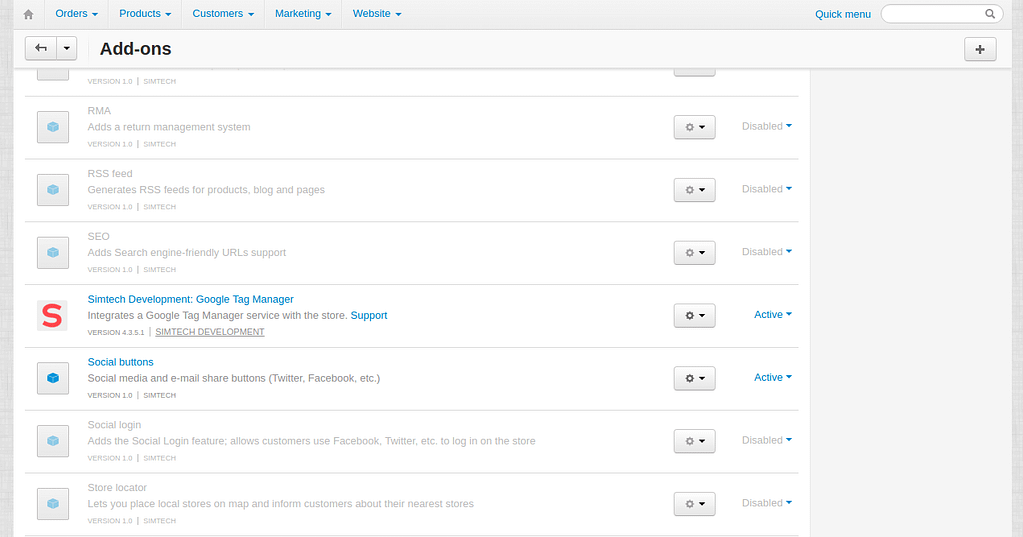
Installing the add-on
Now that you have a Google Tag Manager account, you should install the “Google Tag Manager” add-on on the add-ons list page (Add-ons → Manage add-ons). Click the + button in the top right corner, select an archive and click Upload & Install. You can now find the installed add-on in the list of installed add-ons, just make sure it is set to Active.
Setting up the add-on
General

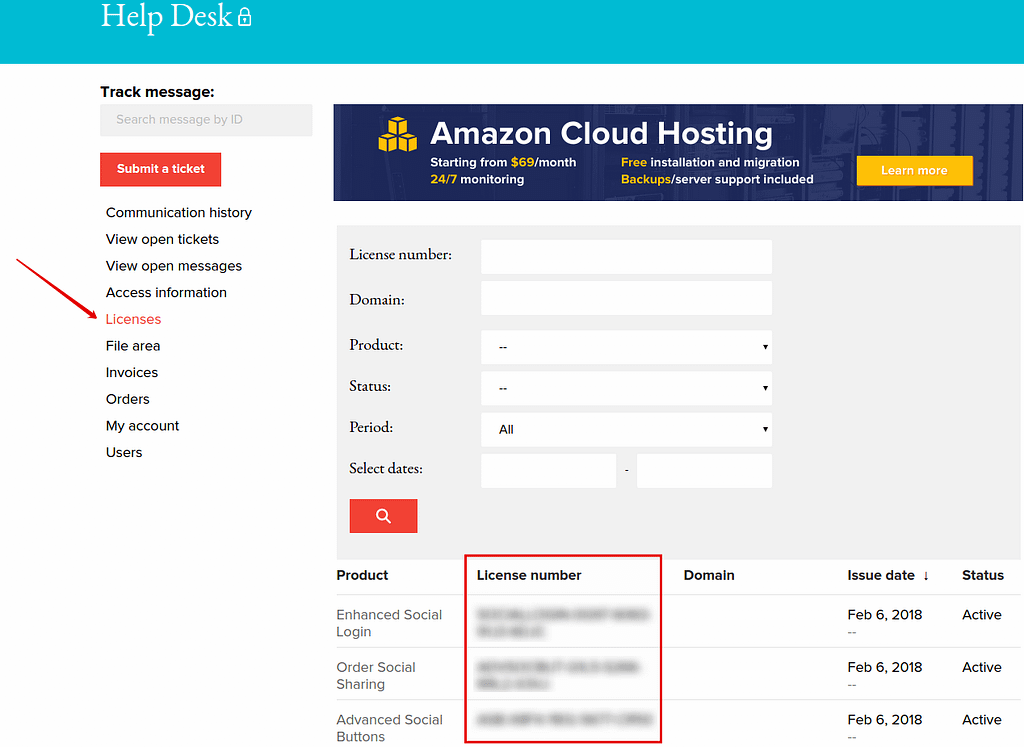
- License key—Enter the license key to activate the add-on. You will receive this key in the order confirmation email. You can also see license keys for all your purchased add-ons in your HelpDesk account. Log in to HelpDesk, and navigate to the Licenses section:
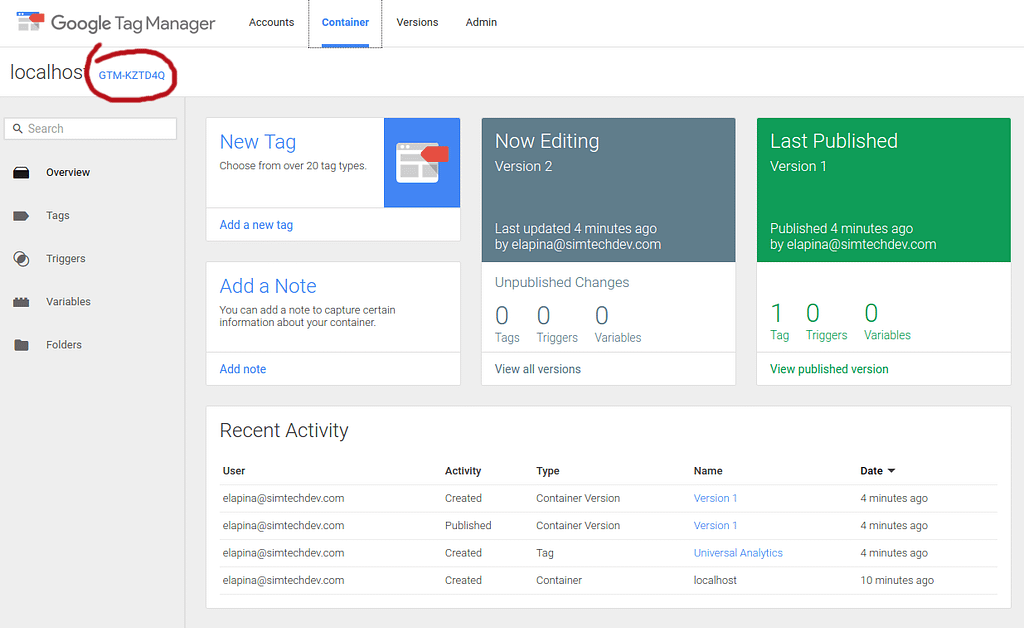
- Google Tag Manager container id—Enter the container ID from your Google Tag Manager profile.
- Use conversion tracking—AdWords conversion tracking shows you what happens after a customer clicks on your ads. You can track conversions in your AdWords profile. The event triggers upon successful order placement on the checkout.compelete page.
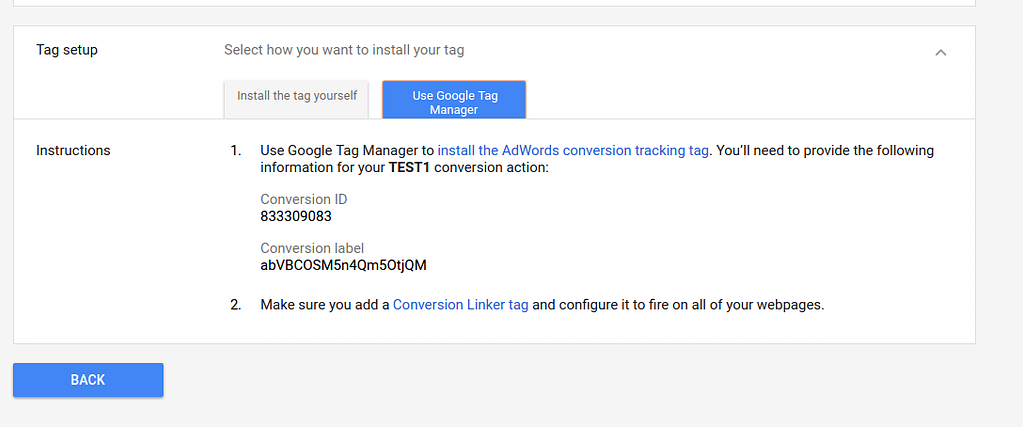
- Conversion ID—To track the conversion used, the ID should be copied from the tag settings in your AdWords profile.
- Conversion label,—To track the conversion used, the label should be copied from the tag settings in your AdWords profile.
To get Conversion ID and Conversion label, go to the Conversions section:

Select conversion and copy the data:
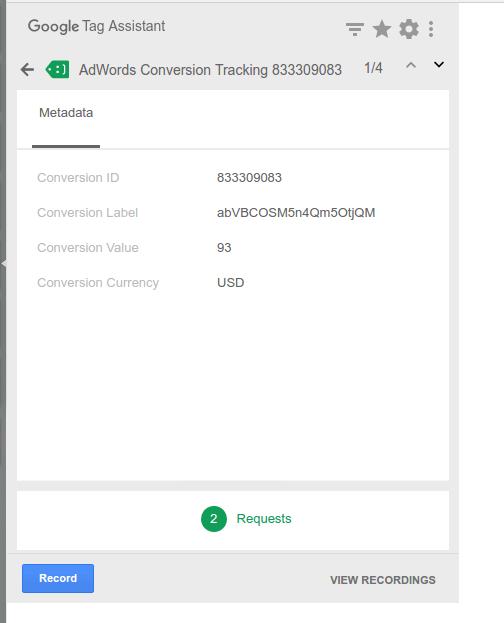
You can use Google Tag Assistant to view the conversion details:
DataLayer events
In the DataLayer events tab, you can see a list of events that you can track using your Google Analytics account. See How to track Google Analytics events in Google Tag Manager section for more details.

- Data Layer—It is a JavaScript array which is used to store information and send information to the Google Tag Manager container. For more details, please refer to the Developer Guide.
When the add-on is installed and configured, you can add and update your tags, triggers, variables in your Google Tag Manager account and all changes will be applied to the website code automatically.

Inserting a hook
It is very easy to insert a hook into the code of your website. All you have to do is to follow quick steps below. Note that this procedure is different for each version of CS-Cart.
For versions 2.x.x
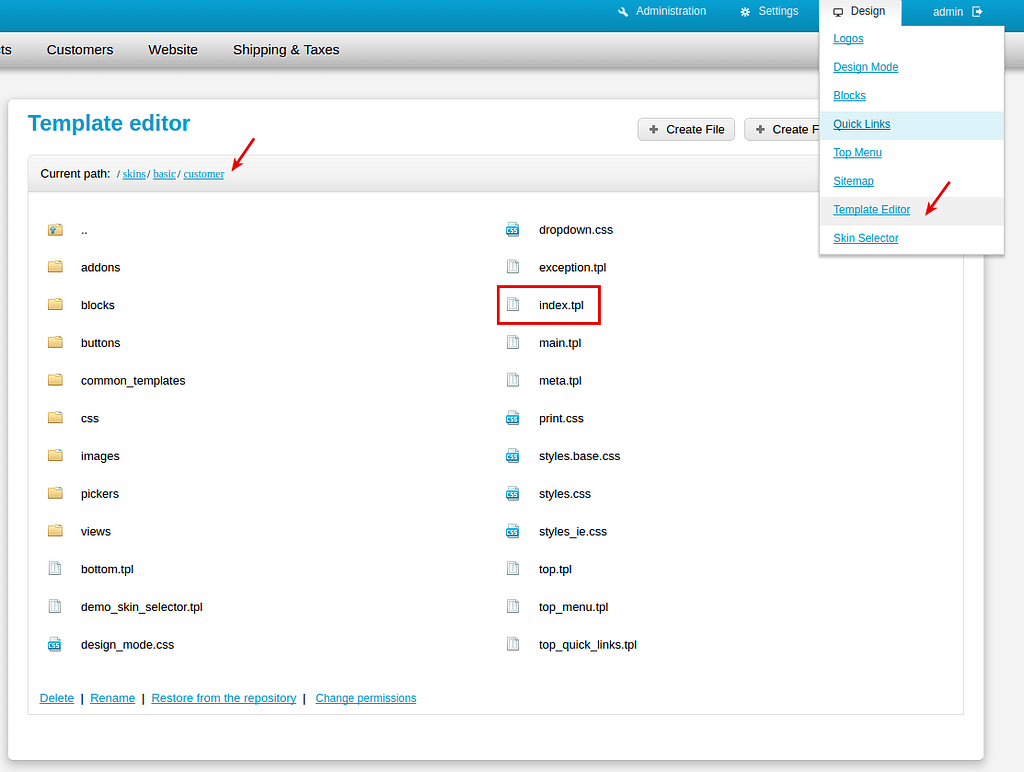
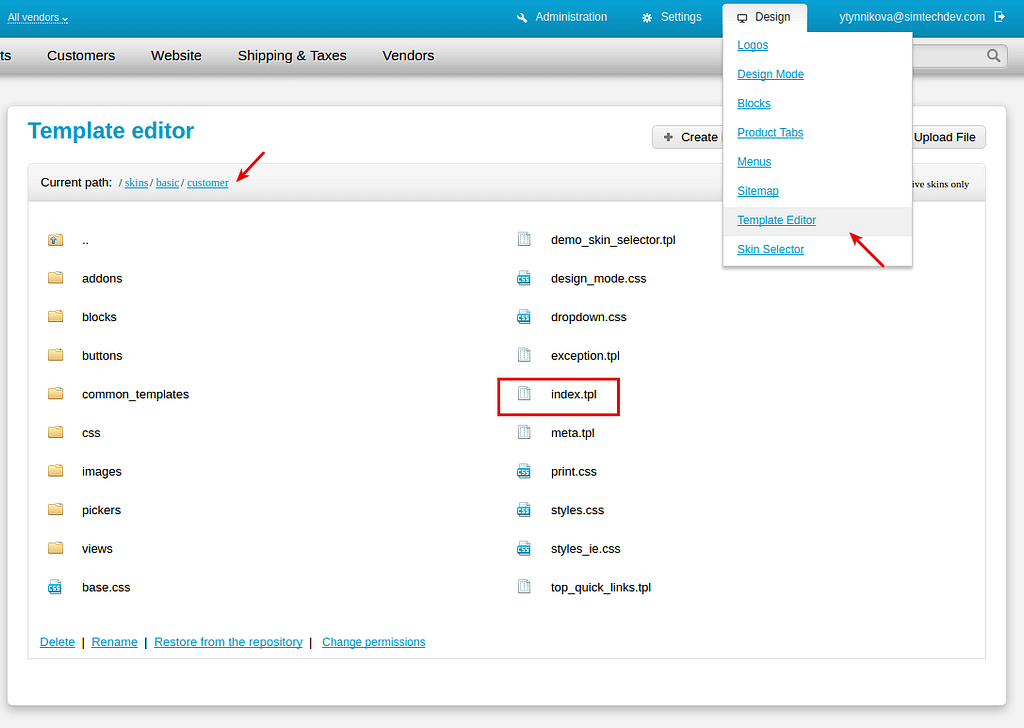
In the admin panel, go to Design – Template Editor and open the skins/basic/customer path and then open the index.tpl file.
Right before the </head> tag insert this line:
{hook name="index:head_scripts"} {/hook}Right after the <body> tag insert this line:
{hook name="index:body"}{/hook}
Click Save.
For versions 3.x.x
In the admin panel, go to Design – Template Editor and open the skins/basic/customer path and then open the index.tpl file.
Right before the </head> tag insert this line:
{hook name="index:head_scripts"} {/hook}Right after the <body> tag insert this line:
{hook name="index:body"}{/hook}
Click Save.
For versions 4.3.1 – 4.3.6
In the admin panel, go to Design – Templates, open responsive – templates – index.tpl.
Right after the <body> tag replace this line:
{if $runtime.customization_mode.design}with this one:
{hook name="index:body"}{/hook}
{if $runtime.customization_mode.design}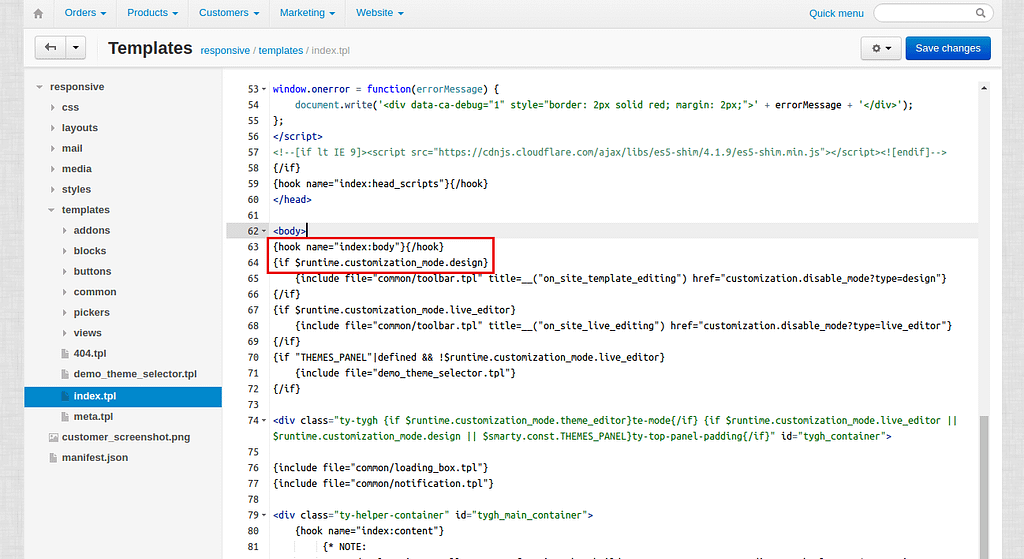
Click Save changes.
Frequently asked questions
Tag not fired through GTM
If you have both Google Analytics tags and Google Tag Manager code on your site at the same time, the Tag Assistant extension can display the “Tag not fired through GTM” notice.

Please note that it is normal behavior and it is not a critical error. It happens due to both Google Analytics and Google Tag Manager are trying to track events in your store, so events may get duplicated.
In this situation, we recommend to continue using the Google Analytics add-on as it can definitely track more events in the store and you do not have to manually insert any tags to the code of your site. In this case, you can use Google Tag Manager to deploy other kinds of tags.
But if you want to use Google Tag Manager anyway, you can disable the Google Analytics add-on in your store and create a Universal Analytics tag within Google Tag Manager.

To learn how to deploy Google Analytics within Google Tag Manager, please visit Google support.
Code found outside of <body> tag

Google recommends to ignore this error. The recommendations for how to implement the Google Tag Manager container code have changed. While implementations with the container code entirely in the <body> will continue to work as is, it’s now recommended that the container code be split, with the <script> portion in the <head> and the <noscript> portion in the <body>. Further context may be found in this blog post. This false error will be resolved in a future update. In the meantime, you may ignore this error.
Read more about Google Tag Manager Errors.
How to track Google Analytics events in Google Tag Manager
Event Tracking with Google Analytics is essential for understanding the user actions on your website such as how many times a product was added to cart, removed from cart, bought in one click, etc. This can be done by using the Data Layer Event code.
A data layer is an object that contains all of the information that you want to pass to Google Tag Manager. Information such as events or variables can be passed to Google Tag Manager via the data layer, and triggers can be set up in Google Tag Manager based on specific events.
The following events will be passed to Google Tag Manager via the data layer:
- add to cart
- remove from cart
- add to wish list
- add to comparison list
- buy in one click
- call request
Our add-on frees you from having to implement the Data Layer Event code by yourself, but you will need to set up events in your Google Tag Manager account.
Setting up events in Google Tag Manager
- Log in to your Google Tag Manager account.
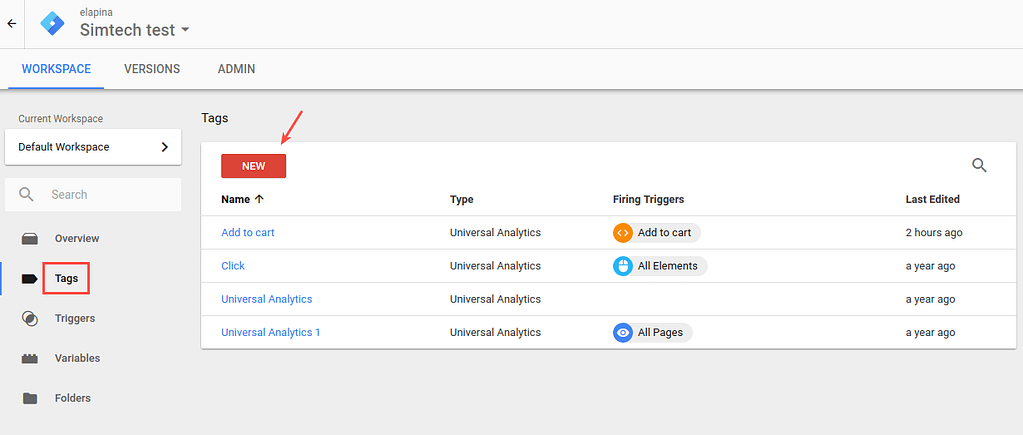
- Select Tags from the left and click New to create a new tag.
- Select Universal Analytics from Tag Type.

- Choose Event for the track type and set your event tracking parameters as desired. Note: This is how your events will be named within Google Analytics.

- Then start setting your triggers. Click the + button to create a new trigger.
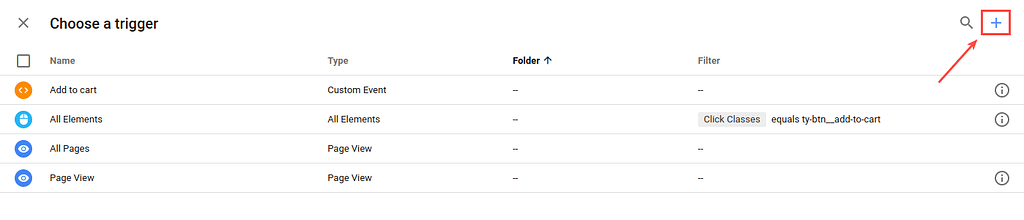
- Select Custom events.

- Enter the Event name.

You can find the event name in the add-on settings.

- Click Save.
- Name the trigger and click Save.

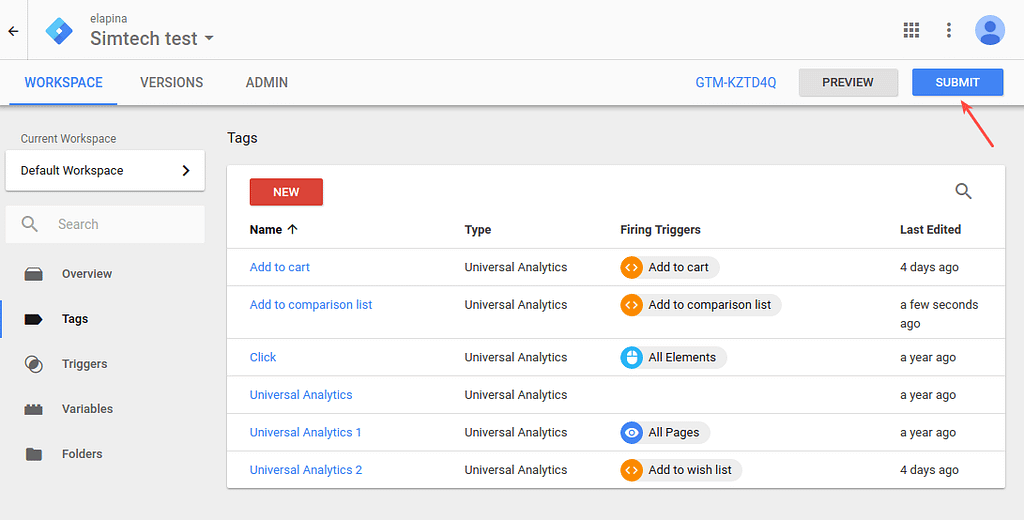
- Click Submit in the top right corner. Then click Publish and Continue.
Done.
Setting the tag for Event Tracking is the same process every time. The difference comes with creating the triggers that fire.
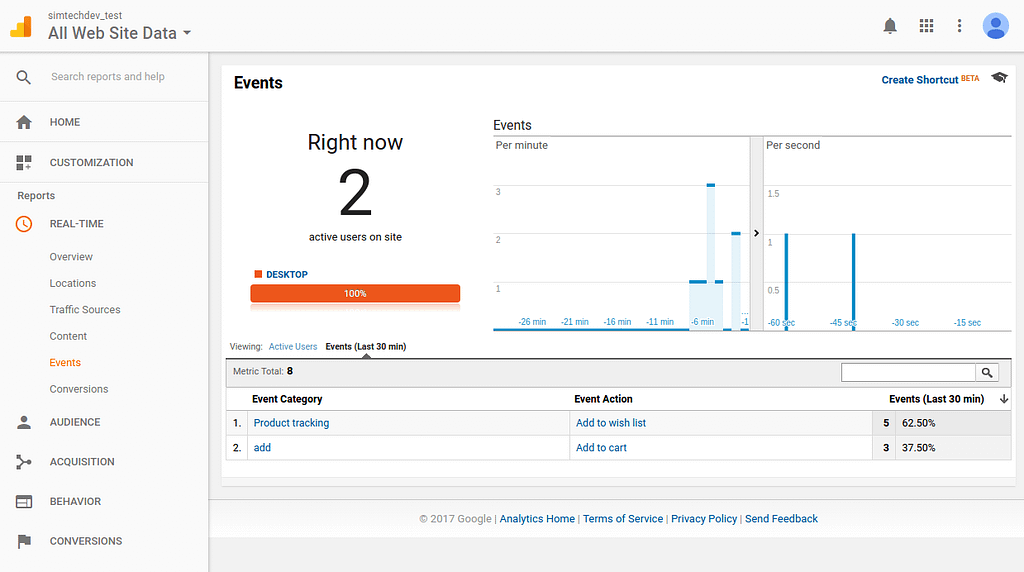
Checking statistics of triggered events
Now that you’ve set events and triggers in Google Tag Manager, it’s to time to see that it’s performing correctly.
Log in to your Google Analytics account and open Real-time events. When a user performs an action that you track, it will appear in the statistics in real time. You will see how many users are visiting your site right now and what actions they perform.