
Running into errors on your CS-Cart project can be intimidating. However, most errors give you a clear clue as to what caused them, which can make troubleshooting these common issues a lot easier.
Unfortunately, a 5xx error or particularly a 503 error is not very polite to your business. However, it sometimes provides you much information to go on. It helps to understand what the most common causes are for the errors in CS-Cart or Multi-Vendor. After finding the reasons, you will need to investigate the root cause and fix the error, which means following several steps to locate the root cause.
In this post, we will cover what the 503 error is and how it typically manifests itself. Then we’ll guide you through several steps on how to troubleshoot it.
We all know that 503 errors happen on the server-side, but the initiator of this error is PHP.
What is error 503 SERVICE UNAVAILABLE?
The 503 (Service Unavailable) HTTP status code indicates that the server is currently unable to handle the request due to a temporary overload or scheduled maintenance, which will likely be alleviated after some delay.
https://datatracker.ietf.org/doc/html/rfc7231#section-6.6.4
When you face the “503 Service Temporarily Unavailable” error, it means that your request (page opening, for example) has come to the server, but the response is not available due to some cause. That could be because the server is too busy, for example, or it’s under maintenance. Unlike other similar error codes, error 503 shows that your website is online and running, but can’t be reached out at the present moment. And in most cases, you can find out the root cause of this error on this page!
How to find the root cause of the 503 error “Service Unavailable” in the CS-Cart:
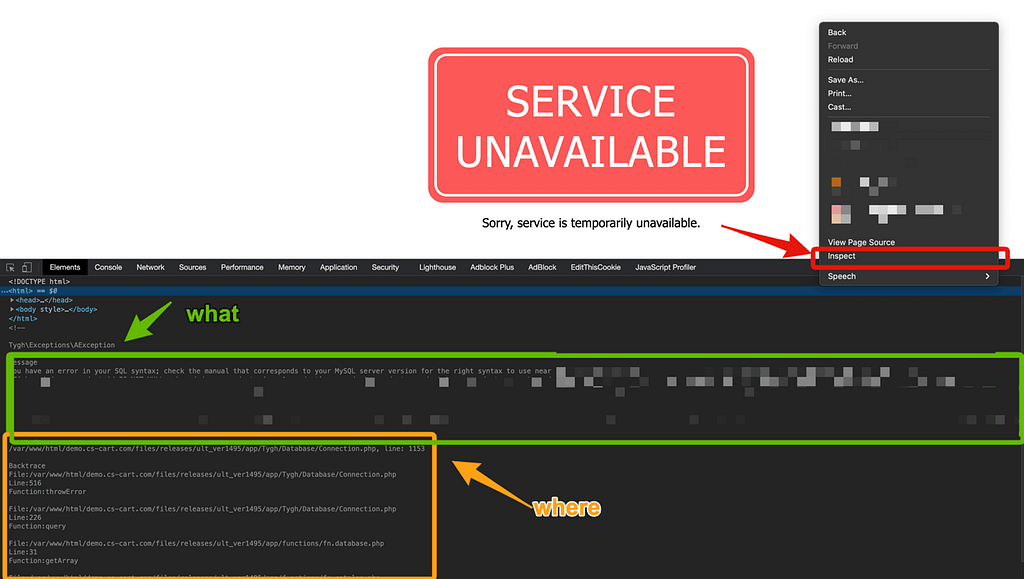
- View source code of current page
Right-click the page and select “Inspect“
- Scroll down to the HTML comment
And you will see the error text. They can point to the add-on, theme, or any function in the code.
- Analyze the error message
– “Message” will show the root cause of the issue
– “Error at” and “Backtrace” will show the problem component. Examine the path to the error carefully, if, for example, the problem is in an add-on, you will see its name in the path “…app/addons/[name]/…”. - Isolate the problem place, try to apply a workaround
Disable, delete, reinstall add-on or revert your latest actions, etc…
- Make a screenshot and contact support, developers, or hosting provider with it to get help, apply a solution 😉
How to fix the 503 error in CS-Cart and Multi-Vendor
Since sometimes you can’t be sure what caused the 503 server error or you can’t guess the root cause from the message. In any given situation, you’ll need to go about troubleshooting it methodically. The following steps, each covering a potential fix, aimed at resolving the different potential root causes.
Revert your latest actions
If you did something and after it, your project is broken – revert your action. Simple, isn’t it? 🙂
Sometimes, to restore a website, you need to take action via SSH/sFTP file changes or some database modifications. If you need help, contact your hosting provider and also request an investigation of this case.
Contact the developer team or add-on developers
If you don’t have a development team and the error on your website is still showing, contact us. Our professional developers, in close communication with the system administration team, will investigate the root cause and fix it.
Temporarily deactivate add-ons and theme
The 503 error “Service Temporarily Unavailable” may come up after a CS-Cart or Multi-Vendor upgrade without checking backward compatibility with the old versions of the add-ons and themes. Sometimes, it happens because the version of the add-on is not compatible with the PHP version or incompatible with the add-on or theme settings.
In this case, we recommend reverting your latest actions.
Increase your server’s resources (plan)
If the 503 error is still occurring despite all your attempts to fix it so far, then there’s a good chance to increase your plan as the problem might be due to a lack of server resources. That is to say, you will need to upgrade your hosting plan to see if that fixes the issue. In many cases, the root cause is an unoptimized PHP code and SQL queries, which lead to an extra high load.
Upgrading your plan is a big decision, however. A smart move is first to contact your web hosting support service and discuss the 503 error and the steps you’ve taken so far with them to solve it. The support team should be able to help you work out the cause and advise you on whether you need to upgrade your plan or not.
At our hosting solution, the support team is more than happy to take a look at a bug for you. We can even make a performance investigation, enable extra logging and profiling of any piece of code to find the root cause. We can pinpoint the bottleneck to something on your site that is causing the problem and prepare a report on it.
Temporarily deactivate Content Delivery Network (CDN) and proxying via Cloudflare
Sometimes, the 503 error will show up not because of a problem on your website, but because of your Content Delivery Network (CDN) or any proxying server issue. If you’re using a CDN or Cloudflare service, a quick way to figure out if that’s the root cause is to temporarily disable it and check in a different network (via mobile or other Wi-Fi).
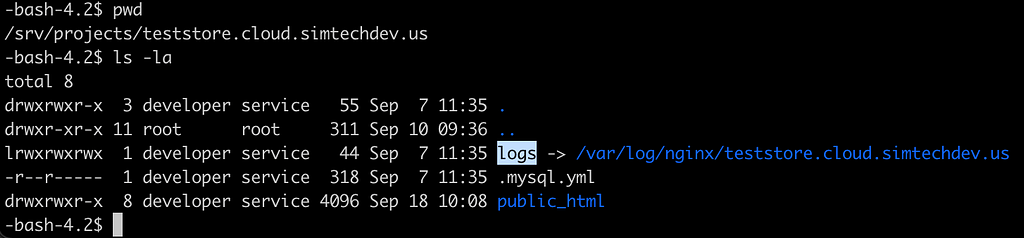
Review log files and enable extra debug in PHP to find the issue
It would help if you also take advantage of your error logs for PHP Fatal errors, Warnings, and Notices. This can help you quickly narrow down the issue, especially if it’s resulting from an add-on on your website.
If your hoster doesn’t provide log files or you can’t find them, you can also add the following code to your local_conf.php file (if you don’t have it, create a new one) to enable logging. But before it, you need to know your IP address and replace it inside $accessibleIps variable.
<?php

$accessibleIps = array(
    '123.123.123.123',
);

if (
    !in_array($_SERVER['REMOTE_ADDR'], $accessibleIps)
    && (
        empty($_SERVER['SERVER_NAME'])
        || $_SERVER['SERVER_NAME'] != 'localhost'
    )
) {
    exit;
}

define('DEVELOPMENT', true);
error_reporting(E_ALL);
ini_set('display_errors', 'On');
define('DEBUG_MODE', true);
ini_set('error_log', 'var/php-error.log');
And the log file will be located in the /var directory in your website root directory. Inside it, look for a file named as php-error.log and open it up.