

In this article let’s examine how to install add-ons. We will show the installation process both by the example of standard and 3rd party add-ons.
There are basically two ways to install an add-on in CS-Cart: manually and automatically. The automated mode means installation through the admin panel. “Manually” means that you have to transfer the add-on files to the server yourself.
How to install CS-Cart add-on automatically
The automatic installation method is available only to the root administrator. The root administrator is created by default at the stage of installing the CS-Cart platform. You can check if you are the root administrator through the database: go to the cscart_users table and check if the is_root field has the Y sign for the selected user.
To install the plugin from the archive, follow these steps:
- Open the Manage Add-Ons page.
- Click +.
- Select the required archive in the appeared window to upload and install the add-on.The archive can be installed in tgz, gz, or zip format.
- Click the “Upload & Install” button.
- Wait until the check of the rights to record files is completed. The installer will inform you if you don’t have enough permissions. Set permissions or grant access to the FTP server.
Installation is complete.
Developers may also rely on the CS-Cart API when add-ons require custom data exchange.
How to install CS-Cart add-on manually
To install an archive with files and folders, you need to unpack it into the root catalog of the store.
- Unzip the file to the root directory of the server, or copy and paste the files independently, while maintaining the file structure.
- Open the Manage Add-Os page.
- Click the “Install” button for the selected add-on.
Installation is complete.
How to set up an add-on
To configure an add-on, open the Manage Add-Ons page. It contains information about add-ons, and all possible actions on them.
- Enable or disable
- Install or uninstall
- Change settings
Add-ons can be set up individually. At the same time, in the Ultimate versions of CS-Cart with many storefronts, the settings can be both general and individual for each storefront.
To edit the settings of a specific module, you need to open the add-on settings page and click on the add-on name. Another way: Gear – Edit.
Let’s consider installation and setup of an add-on using the example of a standard CS-Cart add-on.
Google maps
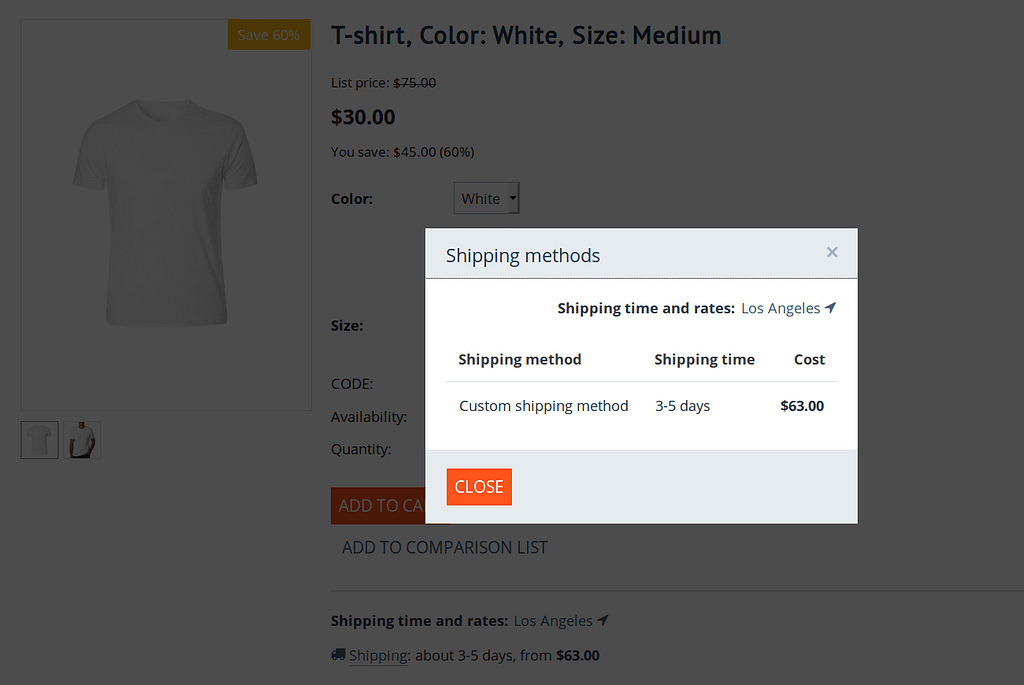
This is a standard CS-Cart add-on. It automatically detects the customer location and adds the ability to show the Google (or Yandex) map to the customer on the following pages:
- checkout
- customer profile
- order details
It can also display a list of stores and pickup points (the corresponding add-on should be installed in advance).
How to configure
- Install the add-on as described above.
- Go to the Google Maps Platform page, select projects Maps and Places, and then follow the instructions at the page.
- Set up an API key at the Google website.
- Add the API key to the corresponding tab in the add-on settings
- Save the changes.
IP Geolocation by MaxMind
The add-on is a third-party for the CS-Cart platform. This solution adds the ability to determine the location of the customer by IP – address using the Maxmind databases. The advantage of the add-on over the standard module is its ability to determine the location at the server level without accessing the user’s browser.This allows content to be offered based on the customer’s location after the first visit of your website. Country, region, city fields will be filled in automatically for the user when placing an order. The store currency will be automatically set to the currency of the customer depending on the country. The module automatically detects the customer language in the store.
How to configure
Install the add-on as described above.
To configure, go to the “General” tab,
- Specify:
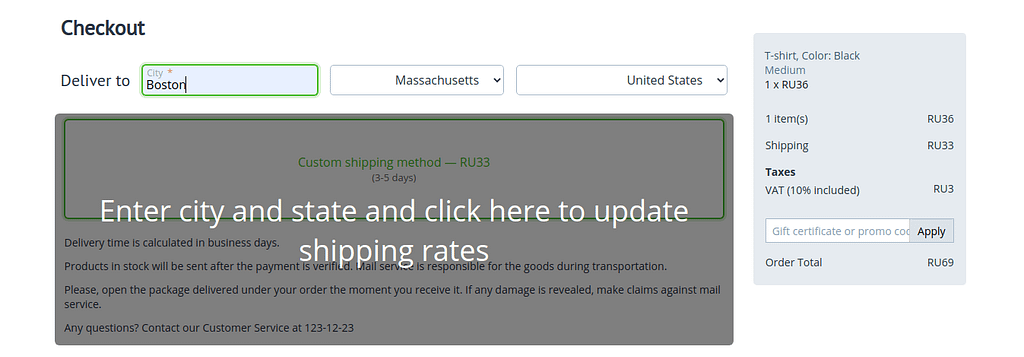
- Use city in user profile – if this setting is enabled, the “City” field will be filled in automatically during registration and while checking out.
- Limit – the number of cities that will be displayed in the drop-down list. By default, its value is 10.
- Minimum length – the minimum number of characters that the user can enter the drop-down menu appears. By default the value is set to 3.
- Show predefined pop-up – if this setting is selected, a pop-up window will be displayed to confirm a specific city.
- Set customer language – when a customer visits a store for the first time, the system will select the language of the customer country (if installed).
- Set the customer’s currency – when the customer visits the store for the first time, the system will select the currency of the customer country (if installed).
2. Download the MaxMind site databases and unpack them into the desired directory.
You should download two archives: city database and CSV file.
* Please note that you must take the CSV file corresponding to the language used in your store from the downloaded archive. For example, for English Language it is the GeoLite2-City-Locations-en.csv file.
3. After adding the required files, click “Save”.
4. Open the settings again and go to the Databases tab.
You should see the names of the added files. Press the button “Update db cities”.
* You will also see the added IP field for test search. This field is intended for testing. Enter any IP address in the field to see the country and city entered IP address.
5. Set up the currency.
- Go to Administration – Currencies and select the required currency from the list of existing currencies or add a new one using the + button.
- On the edit currency page, select the countries for which you want to set currency, and move them to the left section.
6. Set the language.
For this feature to work in your store, please make sure your store has all required languages are installed. To do this, go to Administration – Languages - Language management.
If you do not have the language you want in the list, go to the “Available” tab and set the required language by clicking the corresponding button.
Closing
Installing and configuring an add-on is not difficult. The main thing to look out for is the compatibility of the CS-Cart and the add-on’s version. Also don’t forget to check the minimum PHP version that the installed add-on is compatible with. Our company offers assistance in the add-on installation. With add-ons installed by our team, platform owners can save time and avoid undesirable consequences resulting from incorrect installation. To purchase installation, just add it to your cart when ordering an add-on.