Overview
Increase your pages click-through-rate with our SEO Templates addon. It offers SEO templates for products, categories, images, pages, and blog posts to help you optimize important meta data of your website.
You can specify a page title, meta description, meta keywords, alternative text, and SEO name for the main image with minimum efforts involved. It will free you from manually inserting all these data for each and every item in your store.
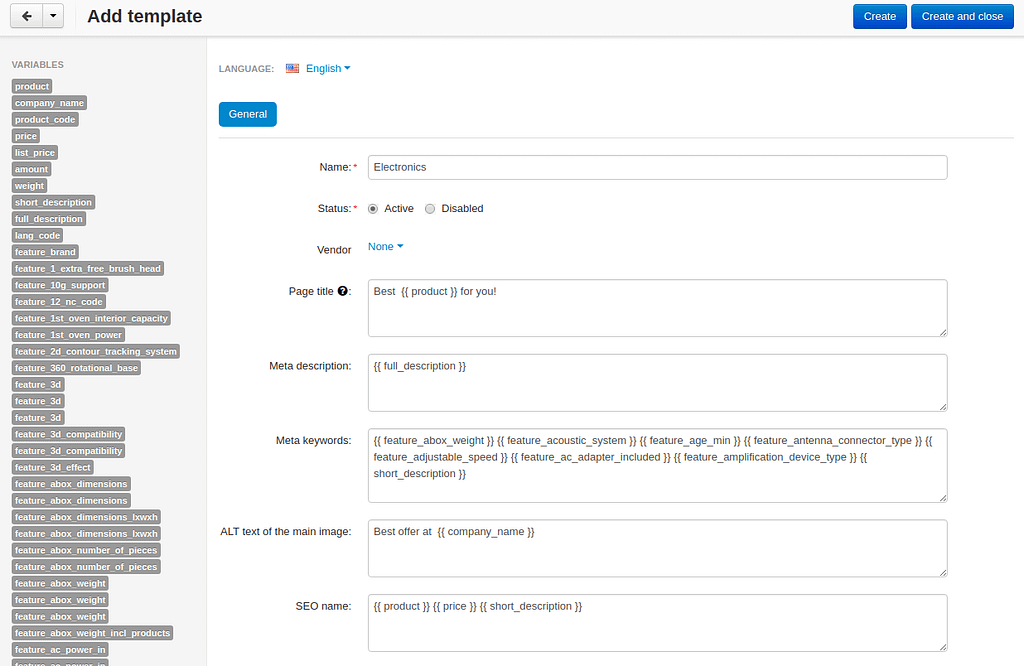
The page title and meta description influence the decision of the searcher as to whether they want to click through on your content from search results or not. The more descriptive, attractive and relevant the description, the more likely someone will click through.
So meta data are one of the most important on-page ranking factors and should be treated with care.

Take your SEO strategy to the next level with the SEO Templates add-on! Follow the guidelines below.
Important
Alternatively, you can apply templates via admin panel:

Key features
- SEO templates for products, categories, images, pages, and blog posts;
- Automatically assigned Page title, Meta description, Meta keywords, ALT text of the main image, and SEO name;
- Ability to overwrite the old metadata;
- Updating templates via cron on the server or manually in the admin panel;
- Ability to select the metadata that will be overwritten;
- Extensive list of placeholders used in a SEO template;
- Ability to clone templates;
- SEO templates created by vendors;
- Ability to create a 301 redirect from old URLs;
- Ability to restrict the length of a SEO name;
- Automatic removal of leading and trailing spaces;
- Automatic addition of a space between multiple placeholders.
Compatibility
The addon is compatible with CS-Cart and Multi-Vendor 4.5 and above, but only versions 4.11.x, 4.12.x and 4.13.x are supported.
Support
This addon is developed and published by Simtech Development Ltd., a CS-Cart developer. You are guaranteed a quality add-on supported by the future versions. If you need help, please contact us via our help desk system.
Demo
Check out the SEO Templates add-on in our demo store.
Managing SEO Templates in the admin area
Installing the add-on
Install the SEO Templates addon on the add-ons list page (Add-ons → Manage add-ons). Click the + button in the top right corner, select an archive and click Upload & install. You can now find the installed add-on in the list of installed add-ons, just make sure it is set to Active.

Setting up the add-on

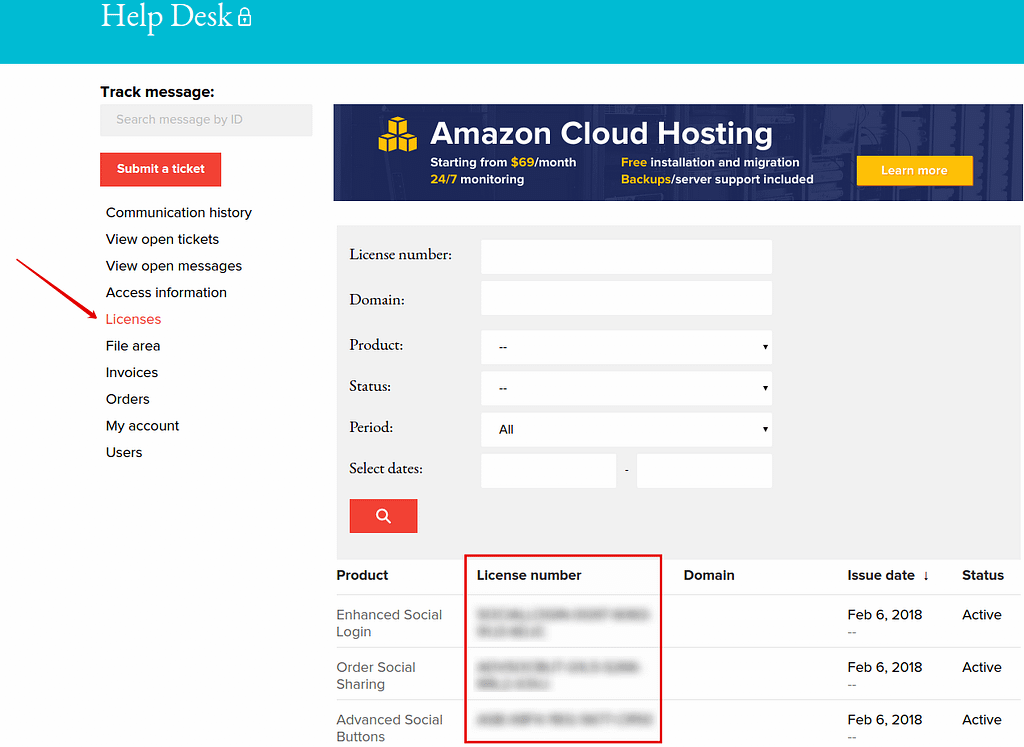
- License key—Enter the license key to activate the add-on. You will receive this key in the order confirmation email. You can also see license keys for all your purchased add-ons in your HelpDesk account. Log in to HelpDesk, and navigate to the Licenses section:
- Rename the product images according to the SEO template.—If enabled, the products images of your store will be renamed according to the SEO template.
Creating a SEO template for products/categories/pages
To create a SEO template, follow these steps:
- Navigate to Website → SEO Templates.
- Click the + button in the top right and select the appropriate template:
- Select template for products if you want to create a template for products.
- Select template for categories if you want to create a template for categories.
- Select template for pages if you want to create a SEO template for pages or blog posts.
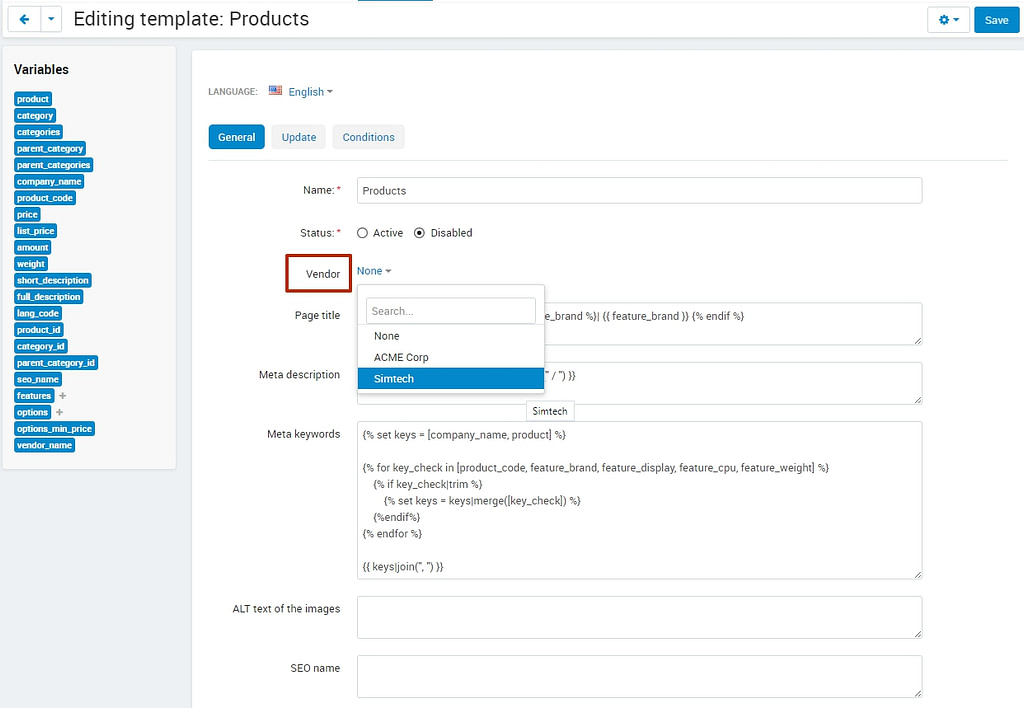
- Fill in the provided fields. The placeholders on the left should help you. You can also use twig.
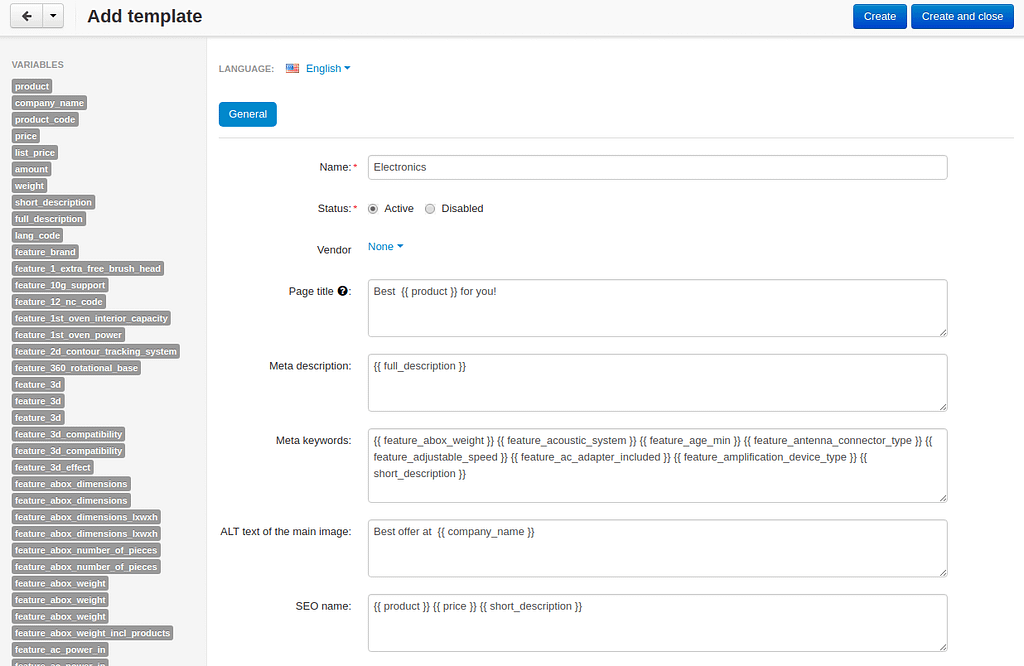
Name—Enter a name for the SEO template.
Store—Select an appropriate storefront if you are using CS-Cart with multiple storefronts.
Page title—It is the main text that describes a web page. It appears at the top of a browser’s window.
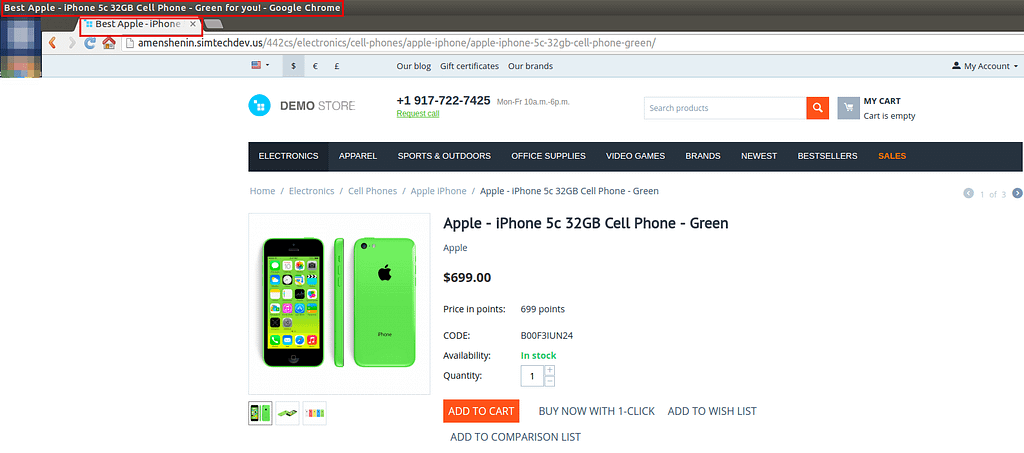
Page titles also show up in the search engine results as the links that potential visitors will click on.

Meta description—It is the short paragraph of text placed in the HTML of a webpage that describes its content. The meta description will then appear under your page’s URL in the search results. The more descriptive, attractive and relevant the description, the more likely someone will click through.

The meta description will also appear when shoppers share your products in social networks.

Meta keywords—It is one of meta tags that you can insert into your web pages to provide search engines with information about your pages that isn’t visible on the page itself. Be sure that each keyword accurately reflects the content of your pages.
ALT text of the main image—The alt attribute also adds SEO value to your website. It helps your website achieve better rankings in the search engines by associating keywords with images.
SEO name—Use this field for search engine optimization to boost your website’s presence and ensure you gain relevant and consistent organic traffic.
- Click Create.
- Switch to the Conditions tab.
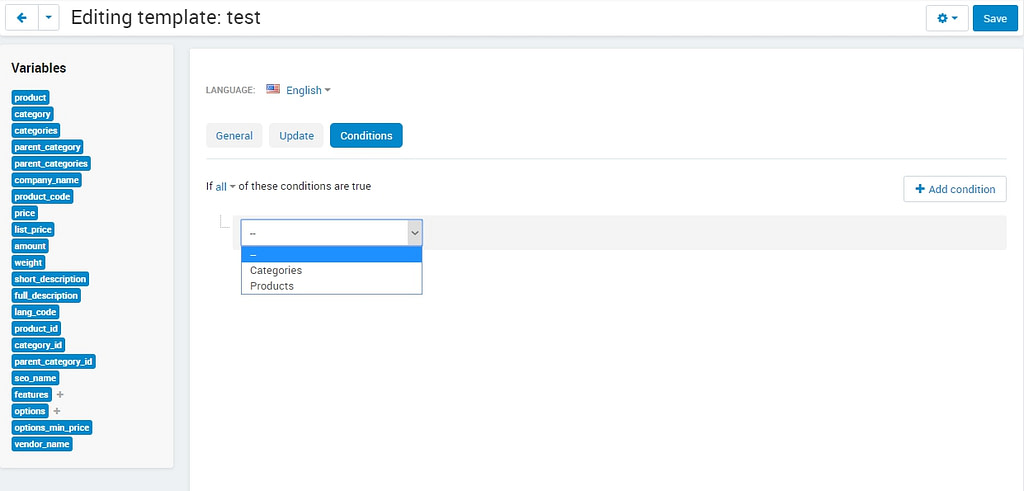
Here, you can add products, categories, or pages this template should be applied for. Simply click Add condition, choose the type (products, categories, or pages), click Add categories or Add product or Add pages and select the desired ones.
The rest of the settings are explained in the Applying a SEO template to products, categories or pages section.
Applying a SEO template to products/categories/pages
Once you’ve created a SEO template, you will need to apply it to products/categories/pages. Follow these steps:
Step 1. Configuring a template
In the admin panel:
- Open the required SEO template and switch to the Update tab.
Configure the following settings:
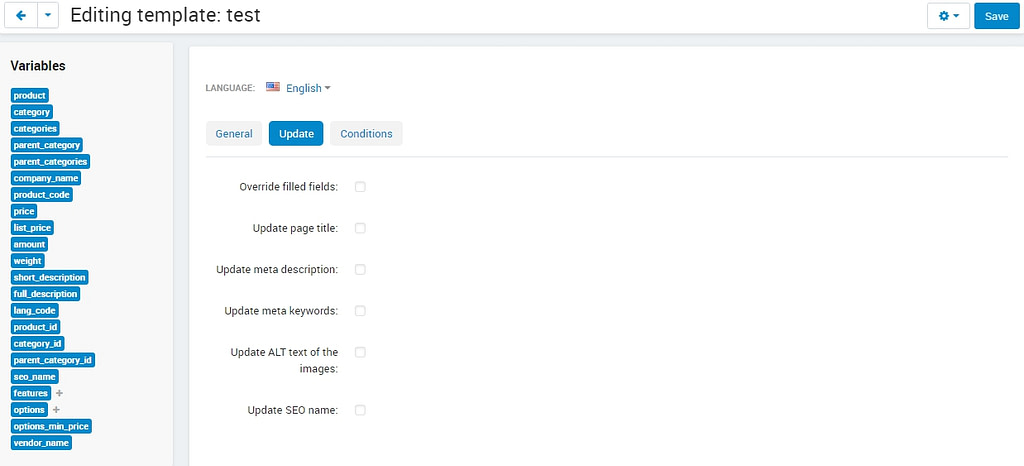
Override filled fields—If selected, the meta data and alternative text for images defined for specific products/categories/pages will be overridden with the values specified for the template.
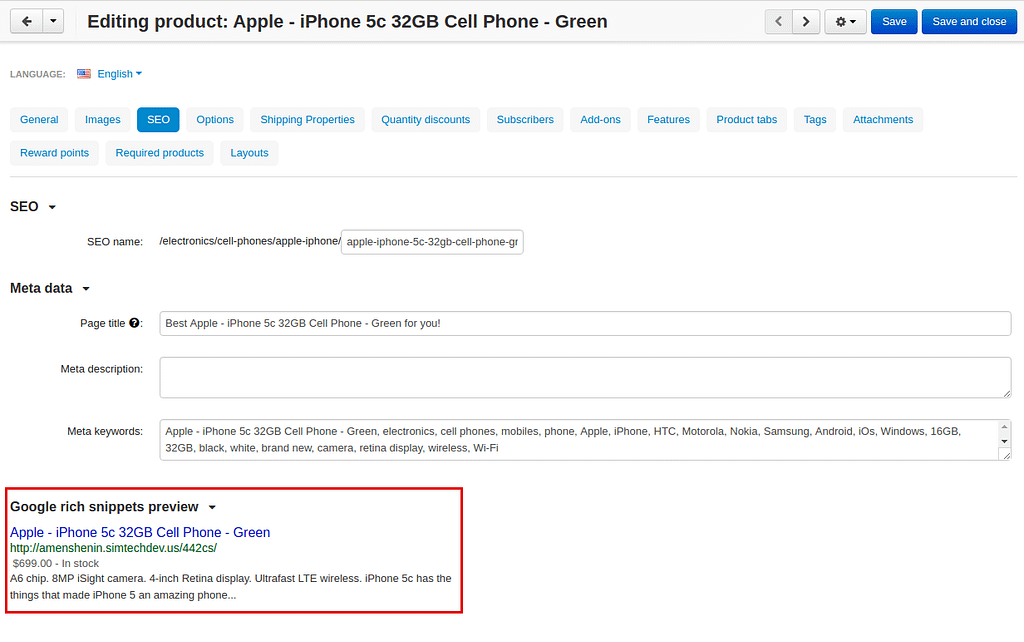
For example, you’ve already specified meta data and alternative text for images for a product on its detailed page:
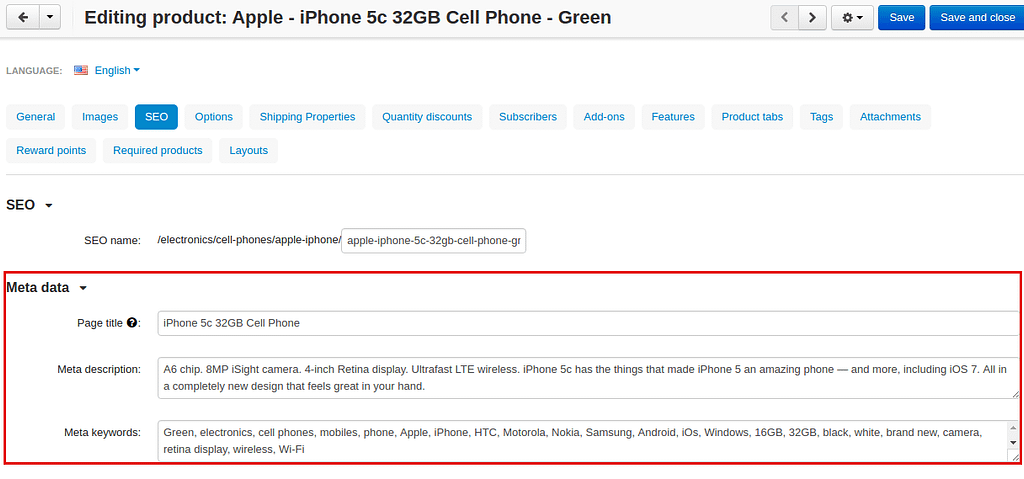
but you want to override it with the values set in this template, check the Override filled fields box. If not, leave this box empty.
- After that, select the checkboxes with the fields that you want to update.
Update page title—If enabled, the page title will be updated. Disable it if you do not want to update the page title.
Update meta description—If enabled, the meta description will be updated. Disable it if you do not want to update the meta description.
Update meta keywords—If enabled, the meta keywords will be updated. Disable it if you do not want to update the meta keywords.
Update ALT text of the main image—If enabled, the ALT text of the main image will be updated. Disable it if you do not want to update it.
Update SEO name—If enabled, the SEO name will be updated. Disable it if you do not want to update it.
To create SEO names, the SEO Templates add-on interacts with the standard SEO add-on. It automatically replaces spaces with “-”, as well as unsafe characters.
- Switch to the Conditions tab and pick categories, products, or pages you want the template to be applied to.
If you want to apply the template to all products, select all categories.
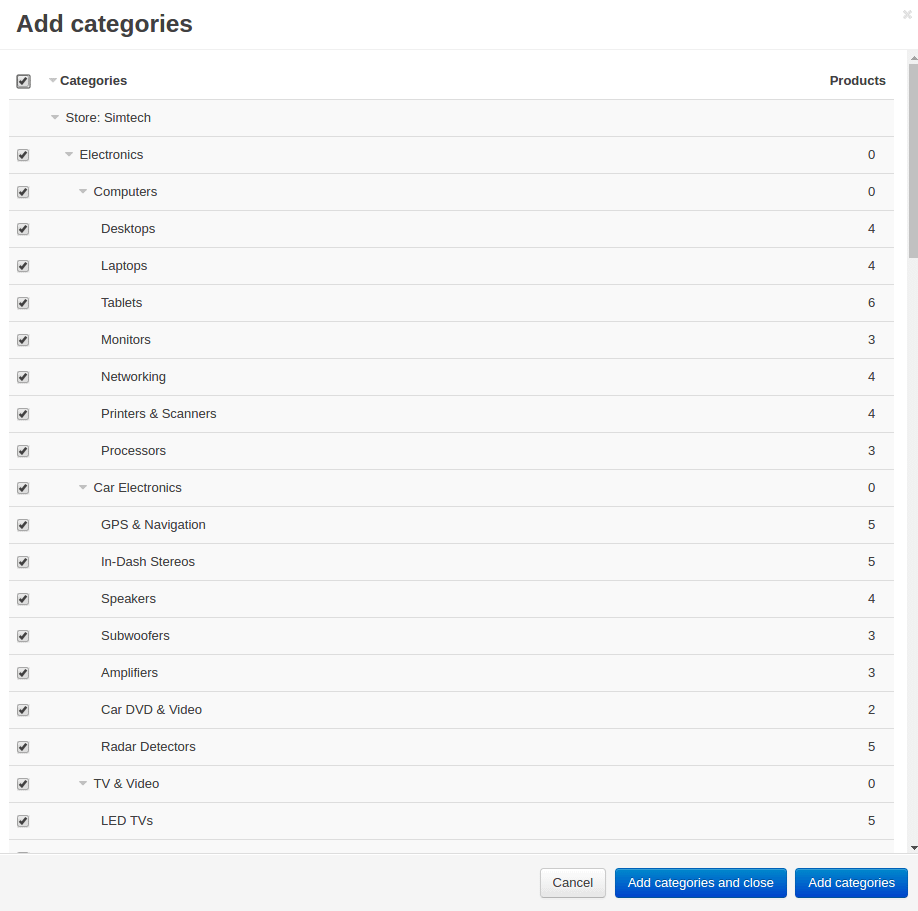
- Click Save.
- On the SEO Templates page have a look at the note on the right.

It contains a command that you should run on your server to apply the changes in the templates. You can set up a cron job to run it according to a schedule (for example, every day, every month) so that you won’t need to apply the new changes manually every time.
Step 2. Applying templates
You can apply templates in two ways:
1. Running a cron
Run the following command on the server:
php /path/to/cart/admin.php –dispatch=seo_pack_cron.apply –cron_password=CRON_PASSWORDwhere:
path/to/cart is the path to your website
CRON_PASSWORD is the access key to cron script that you can find under Settings – Security settings.
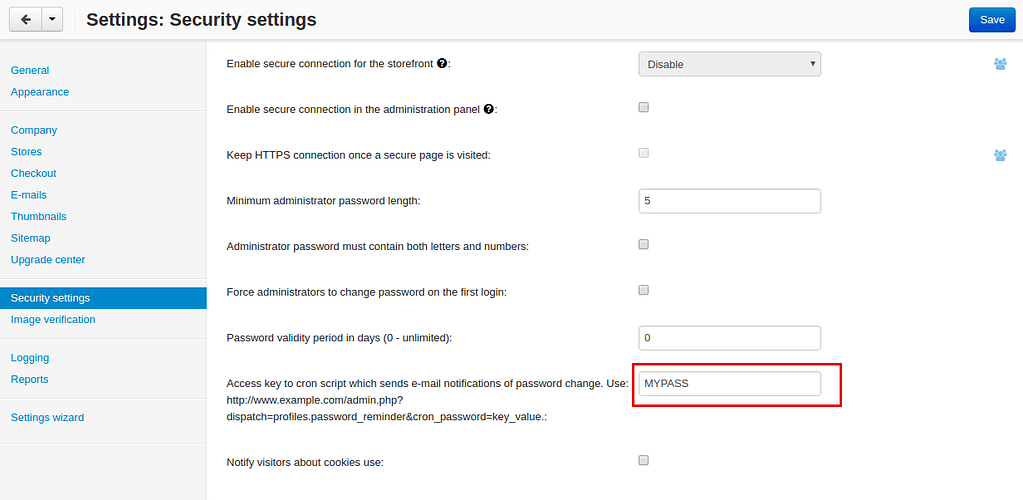

2. Via admin panel
On the SEO templates page, hover the mouse pointer over a template you want to apply and select Generate under the gear button.

Alternatively, you can select Generate on the template details page.
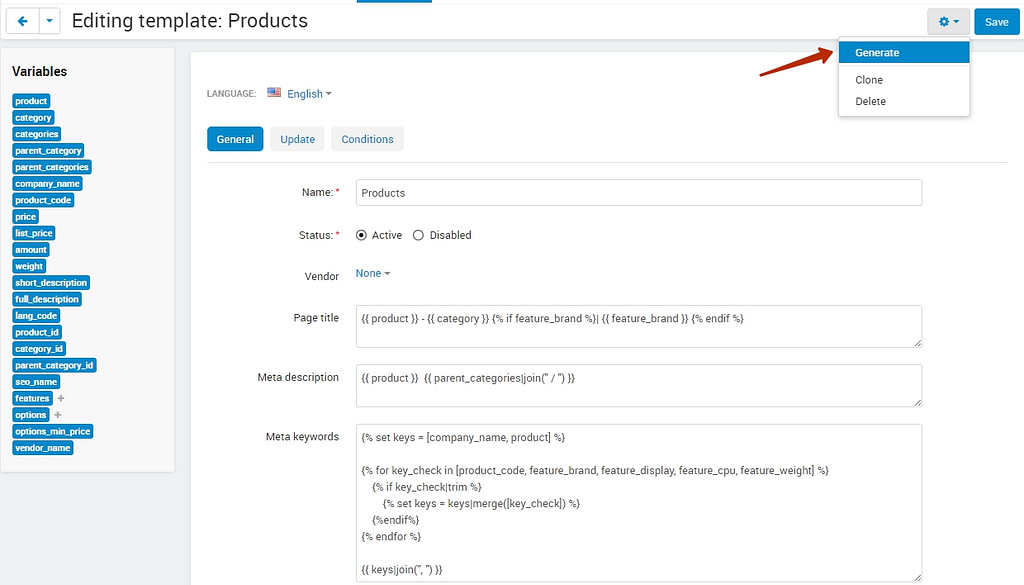
The process will start.
Once it’s complete, you will see a corresponding notice.
Creating a SEO template for all products of the main category
You can create a SEO template for the main category. In that case, the SEO template will be applied to the products in the main category and subcategories.
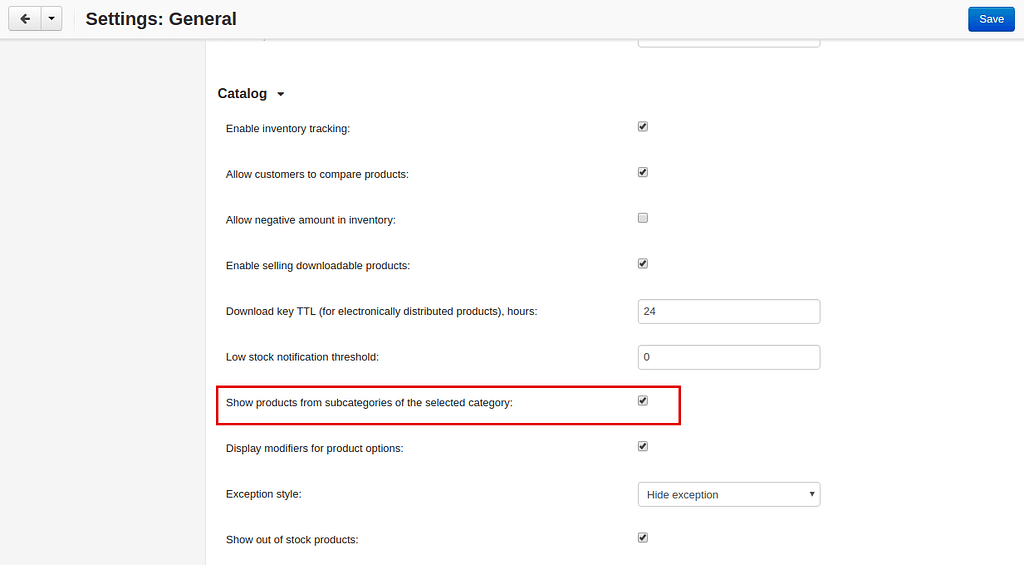
- Open Settings > General, find the Show products from subcategories of the selected category setting.
Make sure that it is active. If not, select the checkbox and click Save. You can disable it later when the SEO CRON job is complete.
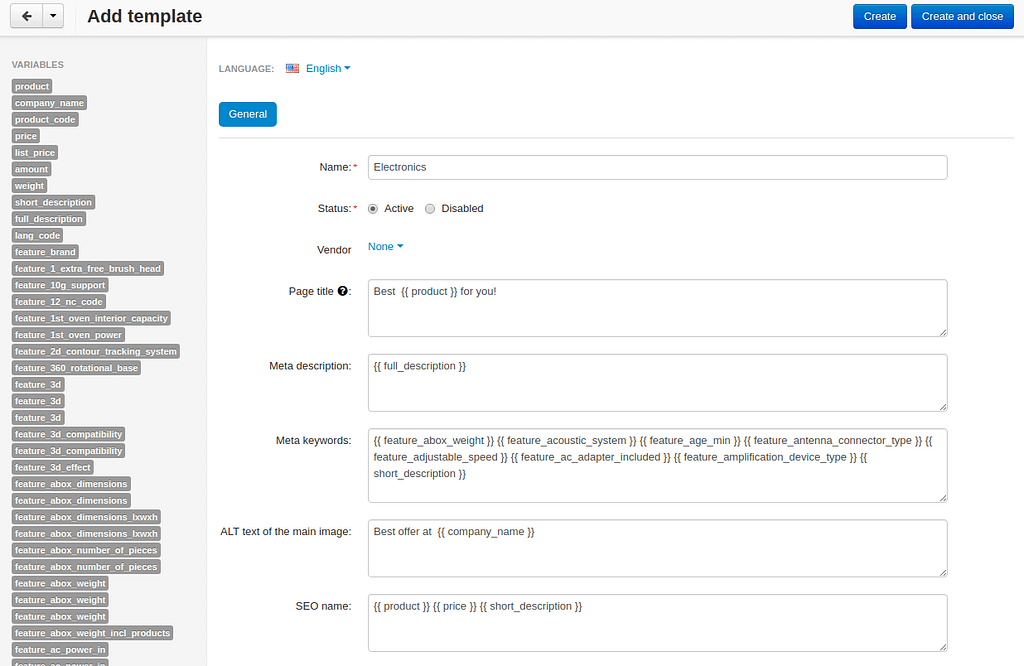
- Open Website > SEO templates and create a Template for products.

- In the General tab, fill in the provided fields.
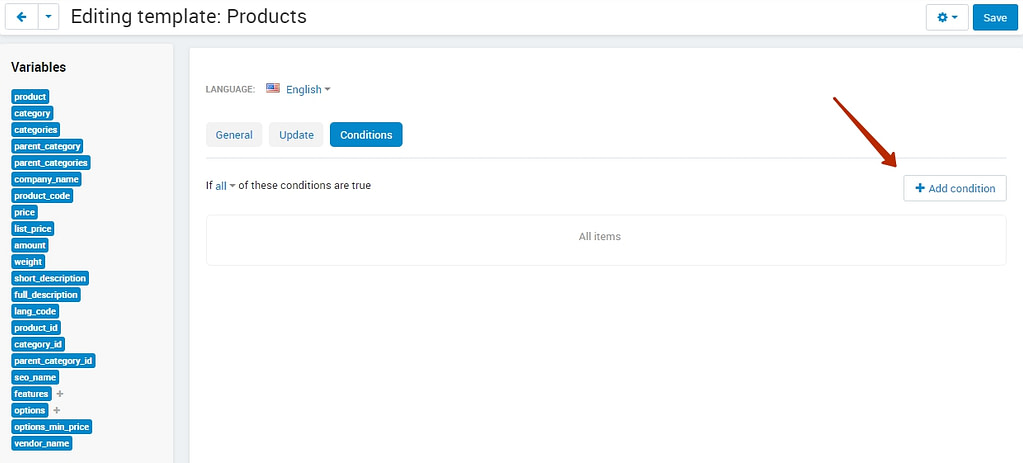
- Open the Conditions tab and click Add condition.
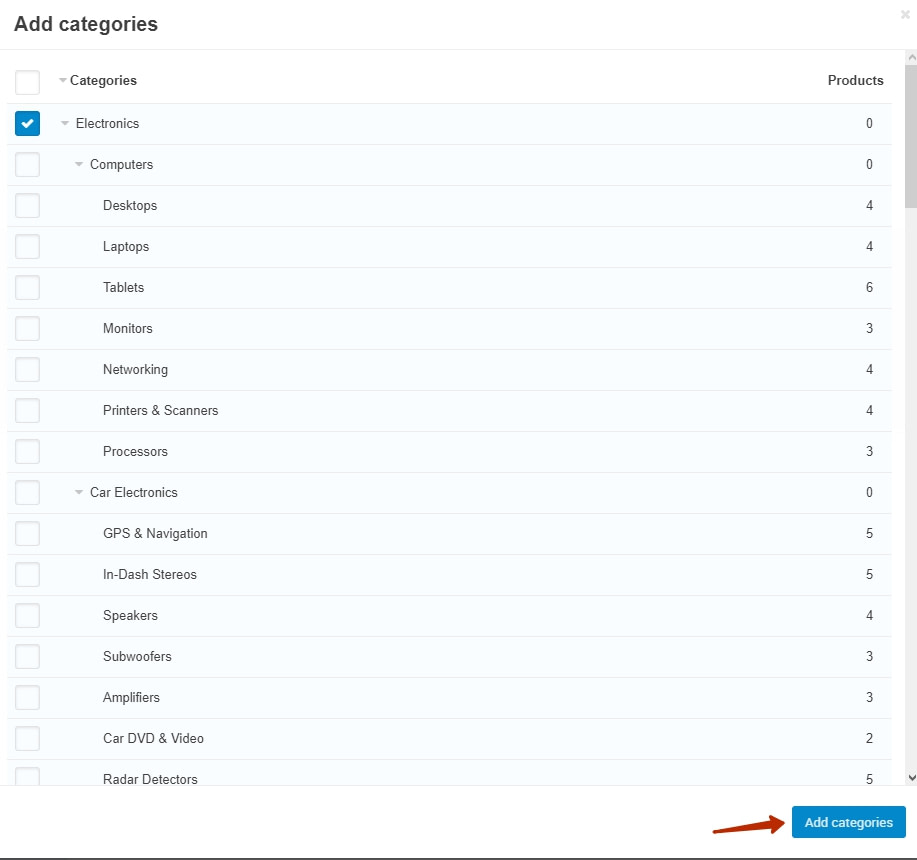
- Choose Categories and click Add categories.


- Choose the category of the highest level and click Add categories.
- Click Save.
Creating a SEO template for images
To create a SEO template for images, follow these steps:
- Navigate to Website → SEO Templates.
- Click the + button in the top right and select the Template for product images.

- Enter a name for the SEO template.
- In the Product image name field, create a template using placeholders on the left.
If the SEO name placeholder is NOT available to you, make sure you enabled the default SEO add-on.
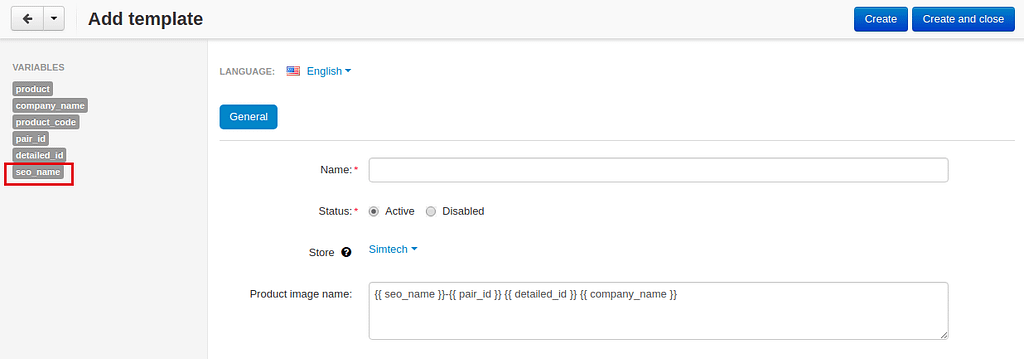
While filling in the fields, except for the Name field, the TRIM function is applied automatically. It removes both leading and trailing spaces from text, and also “normalizes” multiple spaces between words to one space character only. When you add multiple placeholders to the field, a space between them is added automatically.
- Click Create.
- Switch to the Update tab.
- Update product image name—If enabled, the names of product images will be updated according to the template.

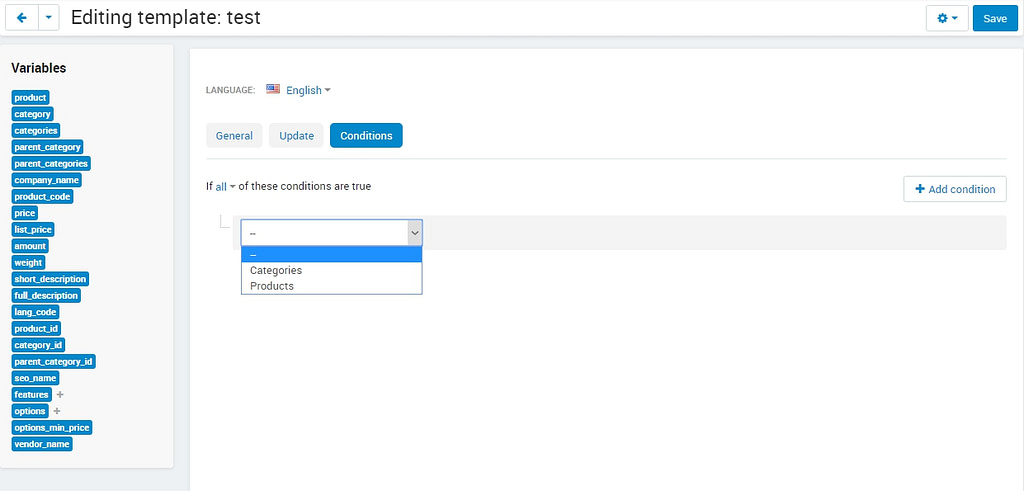
- Switch to the Conditions tab.
Here, you can add products and categories this template should be applied for. Simply click Add condition, choose categories or products, then click Add categories or Add product and select the desired ones.
- Click Save.
- Hover the mouse pointer over the template and under the appeared gear button select Generate.

- Once the template is applied, you will see the result.

Alternatively, you can set up a cron to update product image names automatically.
Translating a SEO template into another language
In order to translate a SEO template:
- Open the SEO template you’d like to translate. Switch the language to the required one.
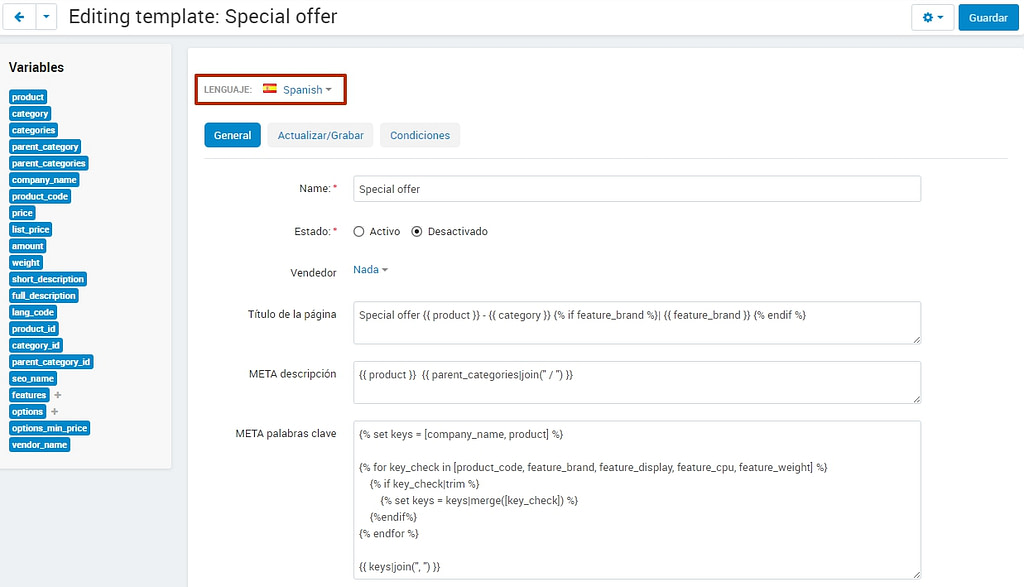
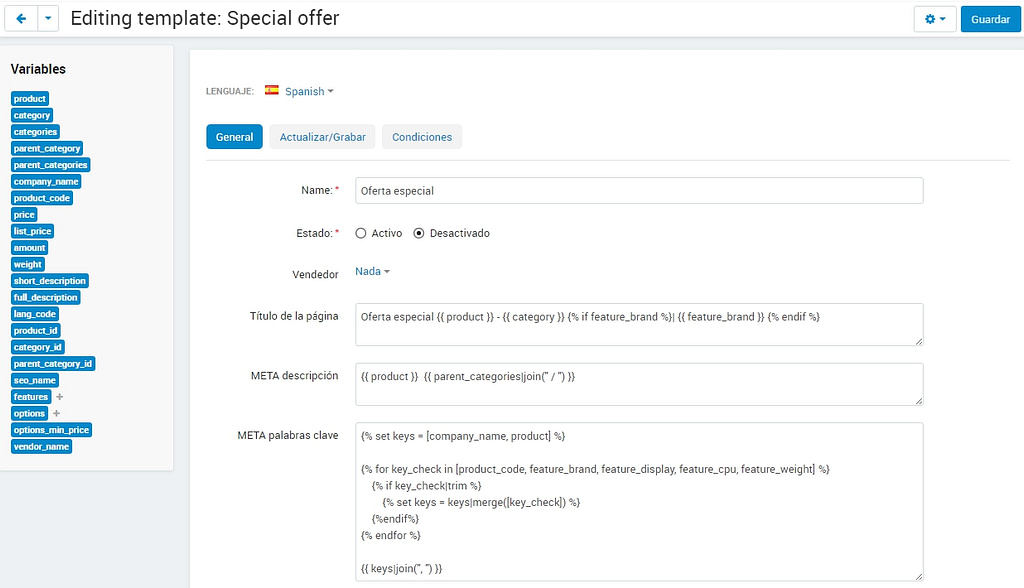
- Translate the language variables into the target language and save the changes.
Creating templates using twig
Twig is a template engine that will allow you to write readable SEO templates using placeholders. You can write desired conditions, capitalize words, replace elements, join elements, etc.
Twig defines three types of special syntax:
{{ ... }}“Says something”: prints a variable or the result of an expression to the template.
{% ... %}“Does something”: a tag that controls the logic of the template; it is used to execute statements such as for-loops for example.
{# ... #}“Comment something”: it’s used to add single or multi-line comments. The content of the comments isn’t included in the rendered pages.
Twig also contains filters, which modify content before being rendered. See the following examples:
- Uppercase
{{ 'example'|upper }} → EXAMPLE- Lowercase
{{ 'EXAMPLE'|lower }} → example- Capitalize
{{ 'example'|capitalize }} → Example- If the price is 0, don’t use the price
{% if price %} {{ price }} {% endif %}- If the feature is not specified, don’t use the feature. It allows you to avoid spaces between commas.
{% if feature_example %} {{ feature_example }} {% endif %}

, where *{{ feature_example }}* is a feature.
For further information, please read Twig documentation.
How to allow/forbid vendors to create SEO templates
You may want to allow some of the vendors to create and edit SEO templates, while you want to forbid this for other vendors. You can do so in the following way:
- Go to Customers > User groups.
- Pick the existing user group or create a new one with the Administrator type.
- Open the Privileges tab and select the Manage SEO Templates checkbox if you want to allow vendors in this group to manage SEO templates or clear the checkbox if you want the opposite.
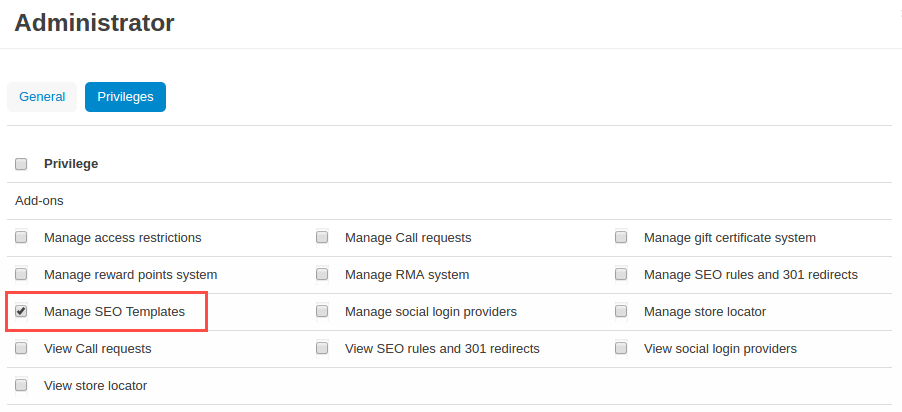
- Click Save.
Compatibility with Common Products
The add-on is adapted to the Common Products add-on. Perform the following settings to ensure the consistent compatibility of the add-ons:
- Open SEO-Templates tab of the Website Menu on the Admin pannel

- Create a new/open an existing Template for product
- Select ‘none in the Vendor field, fill in the meta descriprion and page title, mark ‘Override filled fields’, ‘Update meta descriptions’ and ‘Update page title’ fields on the Update tab.
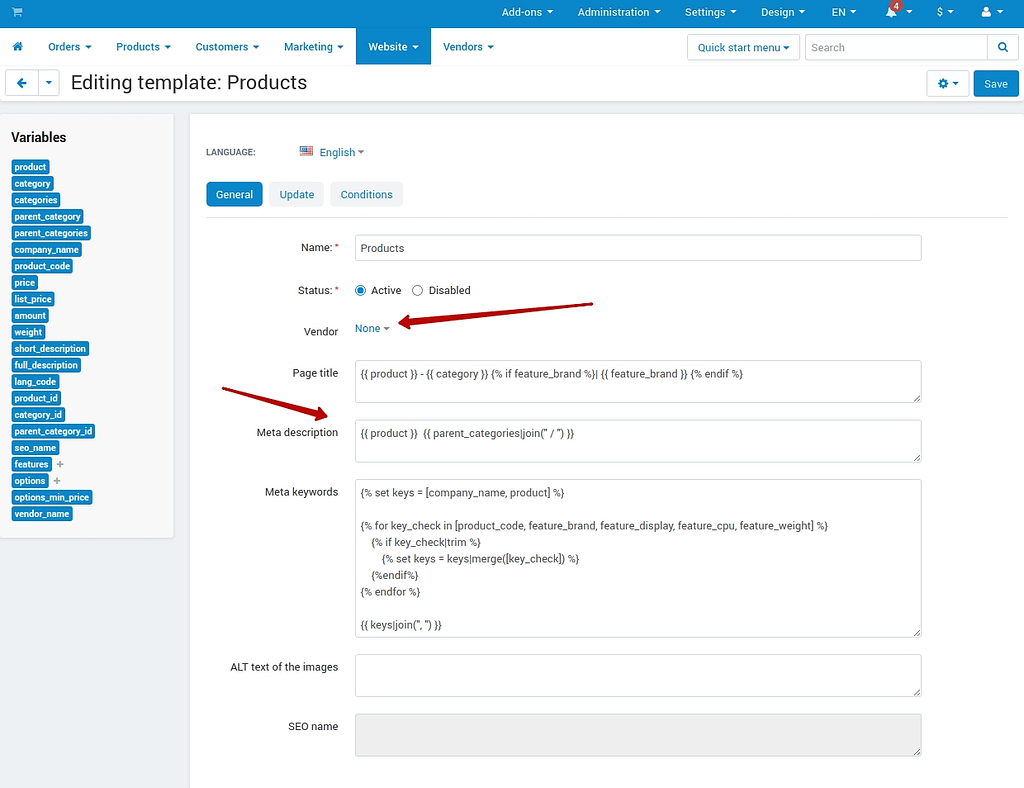
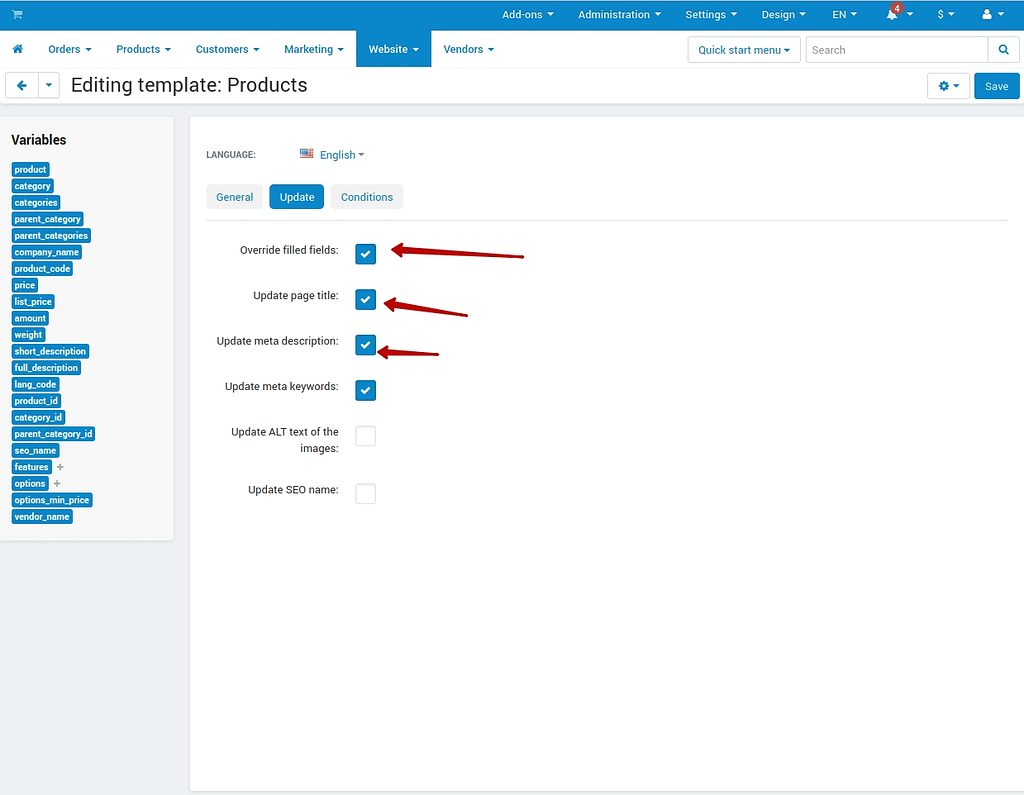
- Create a new product in a Products tab and select ‘All vendors (common products)’ in the Vendors fields
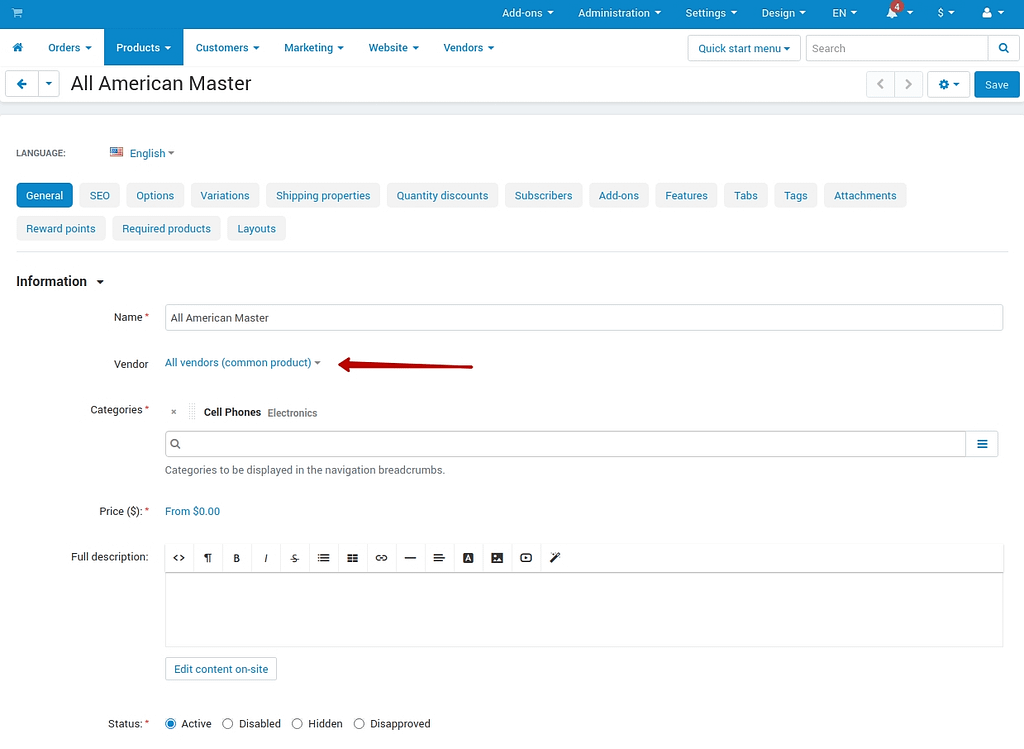
- Log in as a vendor and select a newly created product in the Products -> Products that vendors can sell tab
- Return to the main Admin Pannel and start the Template generation
How to share a SEO template among vendors
Say, you created a SEO template for Vendor A, and now you want to make this template available to Vendor B. You do not want to configure it from scratch one more time, do you? Therefore the add-on introduces an ability to clone templates for further editing. Simply follow these steps:
- Go to Website > SEO Templates.
- Hover the mouse pointer over the template you want to clone and select Clone under the gear button.

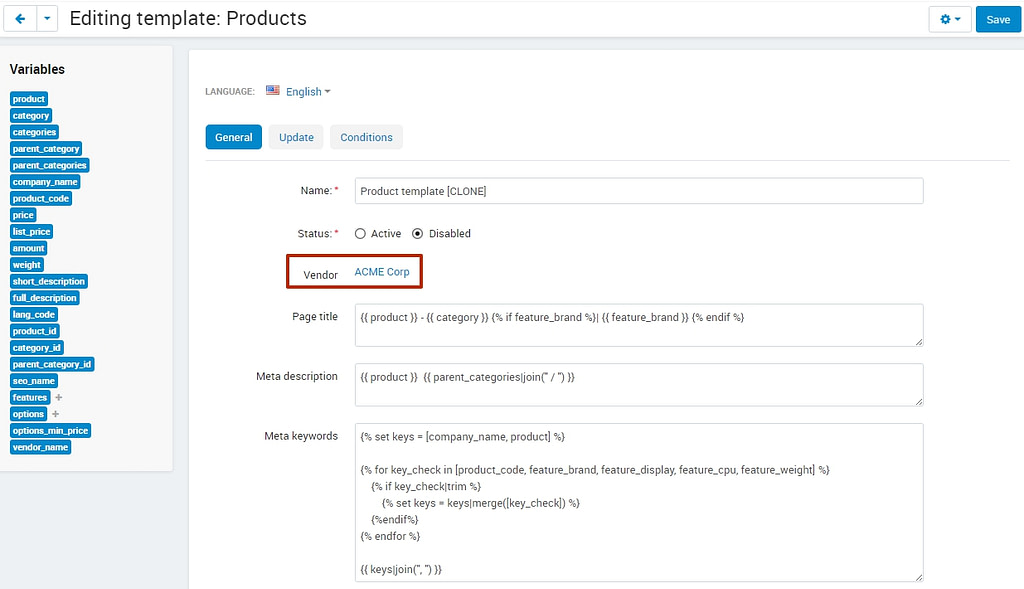
- The template will be cloned with the [CLONE] postfix and you will find yourself on its detailed page. It will have a Disabled status.
- Adjust the settings, select another vendor if necessary. Set the status to Active.
- Click Save.
Read more: eCommerce SEO Trends for 2024
